

Using a barcode scanner in IZI CRM
Using a barcode scanner in IZI CRM
Section titled “Using a barcode scanner in IZI CRM”The scanner lets staff find a product and immediately add it to an order, goods receipt, write-off, or inventory count. A product can have several barcodes for different packaging variants.
The screenshots below show the Russian interface. The controls are in the same positions in other languages.
1. Prepare the scanner
Section titled “1. Prepare the scanner”The scanner must:
- operate as a USB keyboard (HID);
- send
Enterafter each code; - send a code between 6 and 64 characters with no spaces.
Test it in a text editor. Scanning an item should type the code and move the cursor to a new line.
2. Enable the scanner for a club
Section titled “2. Enable the scanner for a club”Initial activation requires an IZI staff account with the appropriate permission:
- Switch to Organizations.
- Open Clubs.
- Find the required club.
- Turn on the Barcode Scanner switch.
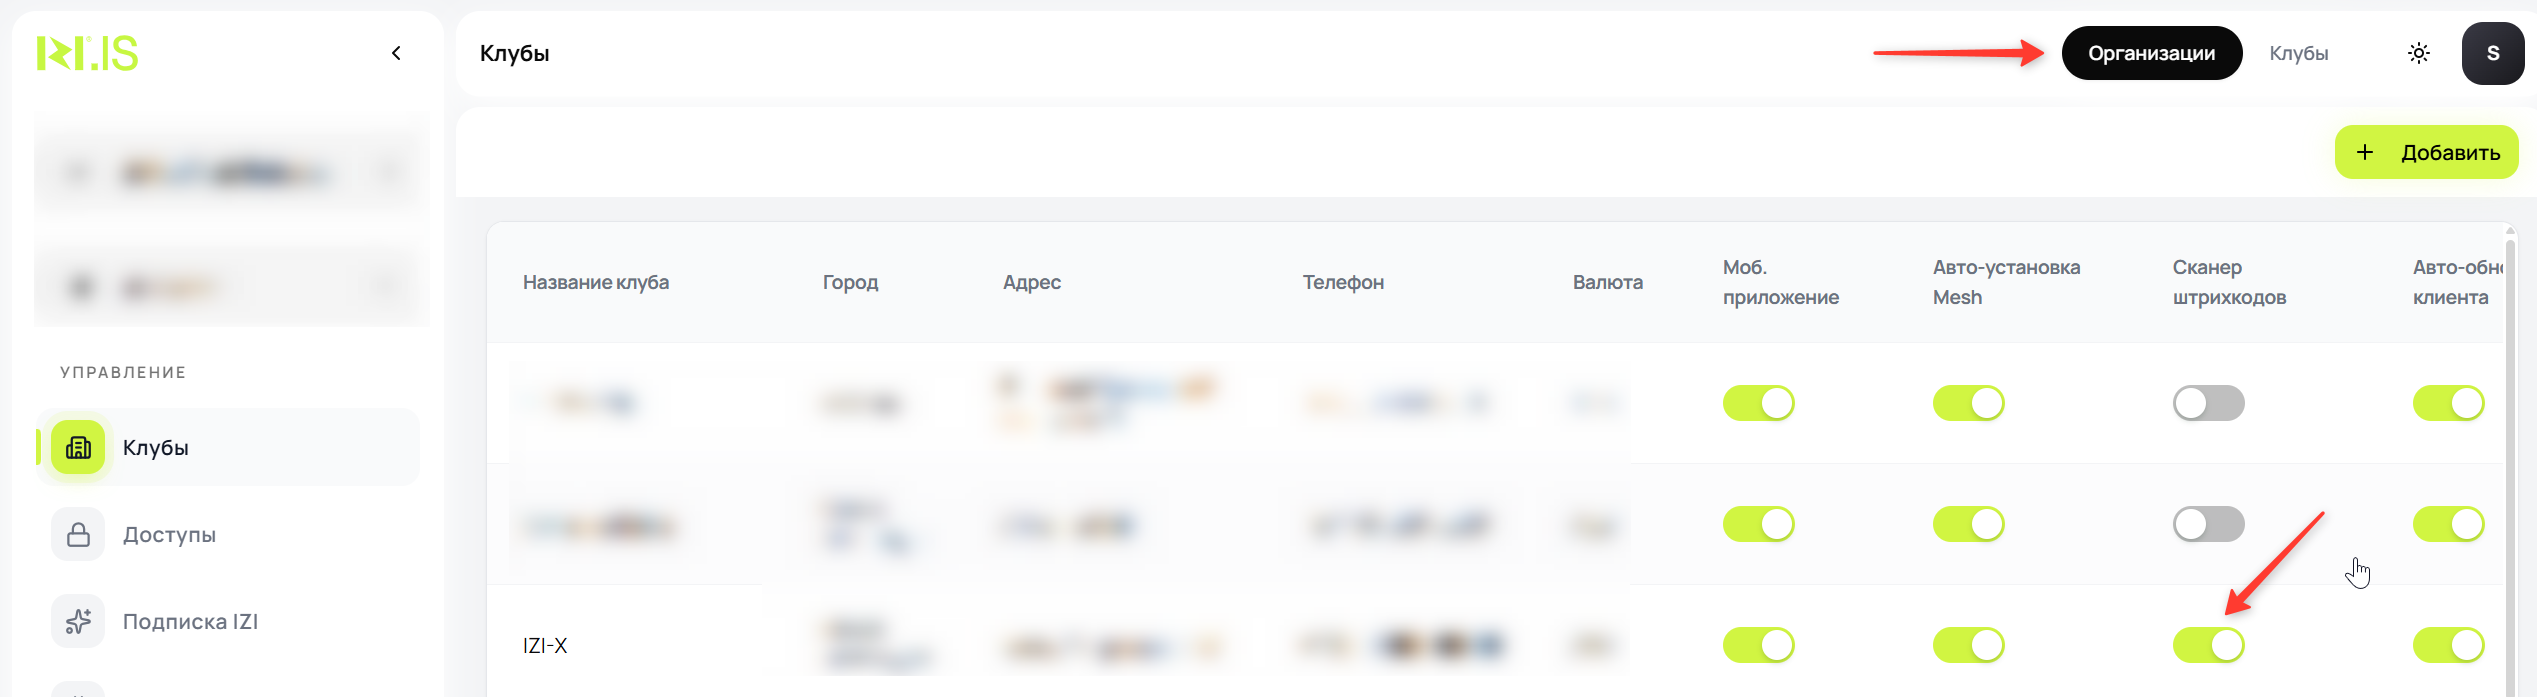
Contact IZI Support if the switch is unavailable or only a status is shown.
3. Assign a barcode to a product
Section titled “3. Assign a barcode to a product”- Switch to Clubs.
- Open Products.
- Create a product or open an existing one.
- Find the Barcodes field.
- Focus Scan or enter a code.
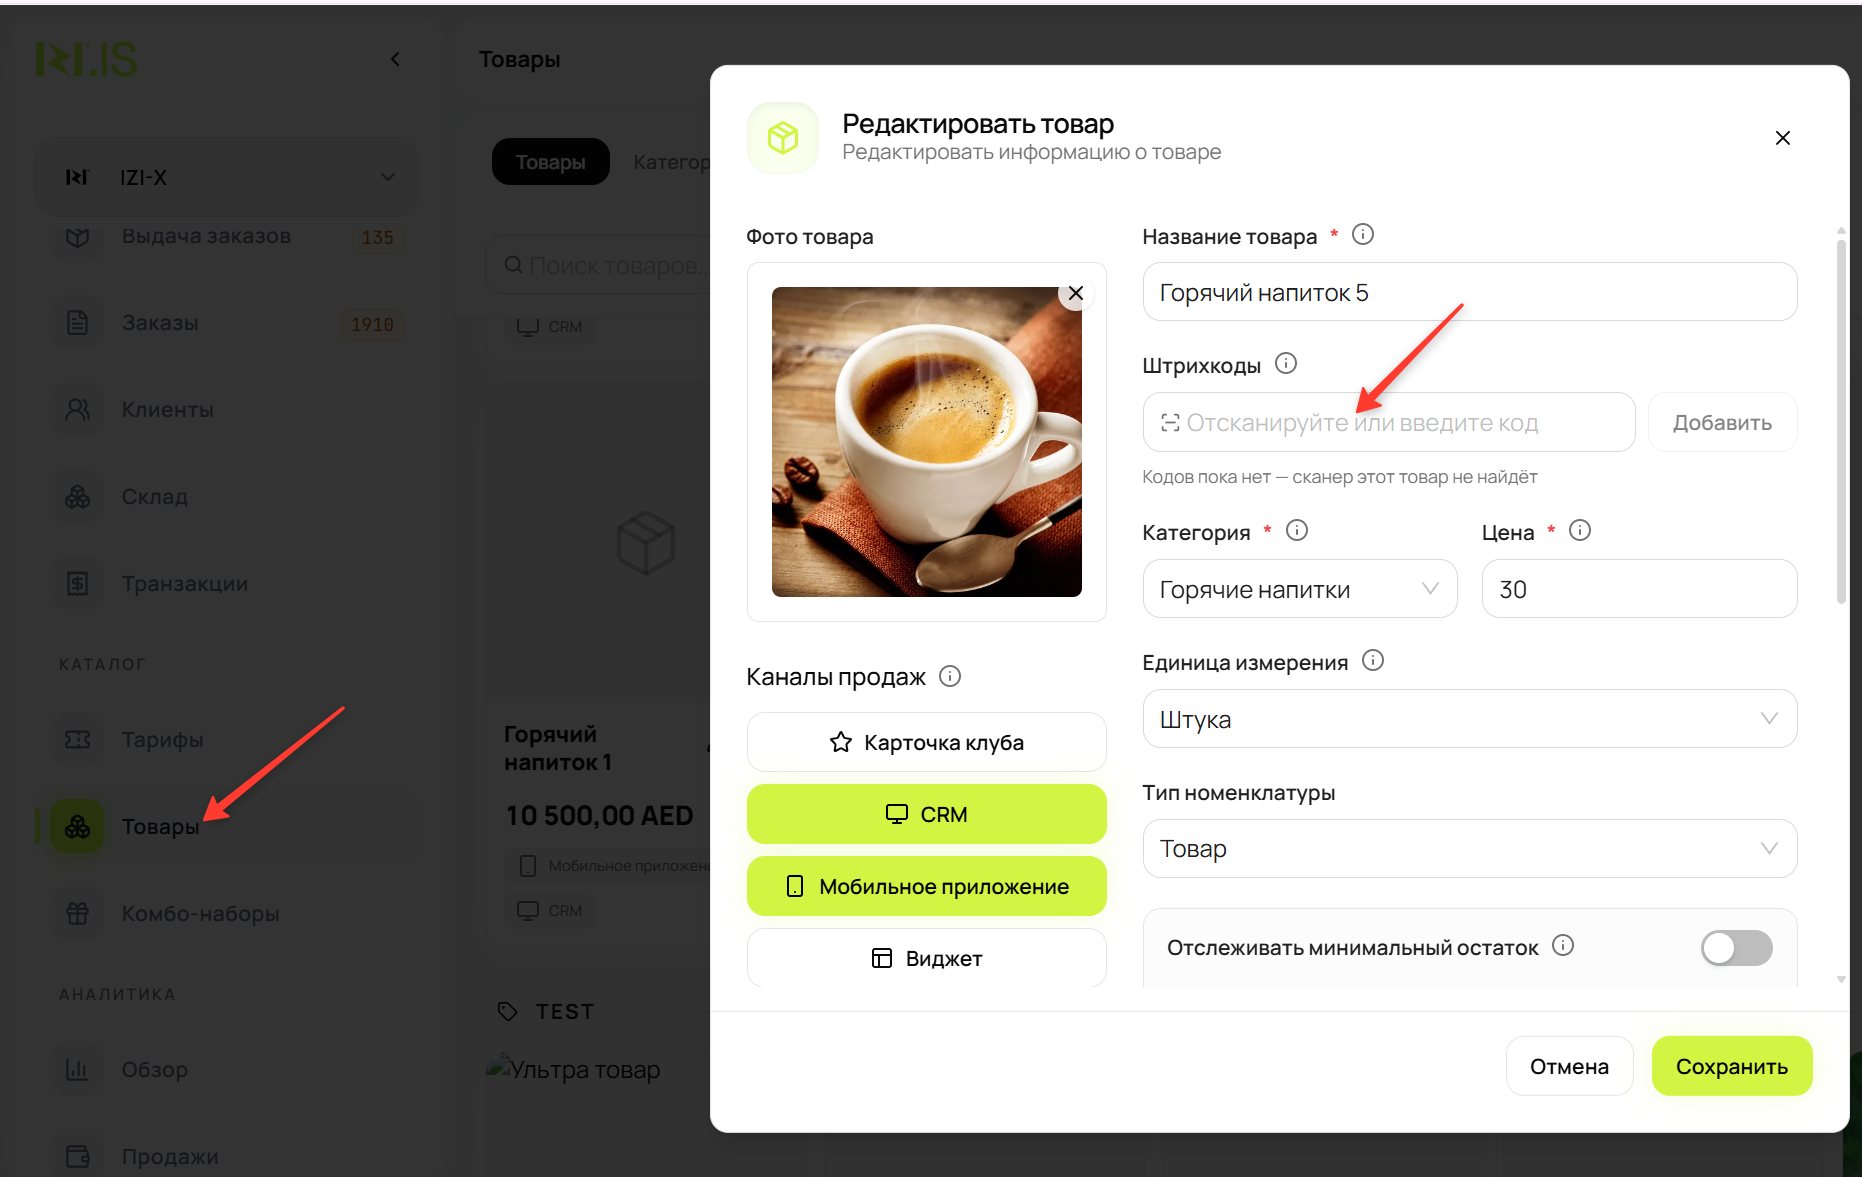
- Scan or type the code.
- Press
Enteror select Add. - Confirm that the code appears as a tag below the field.
- Select Save.
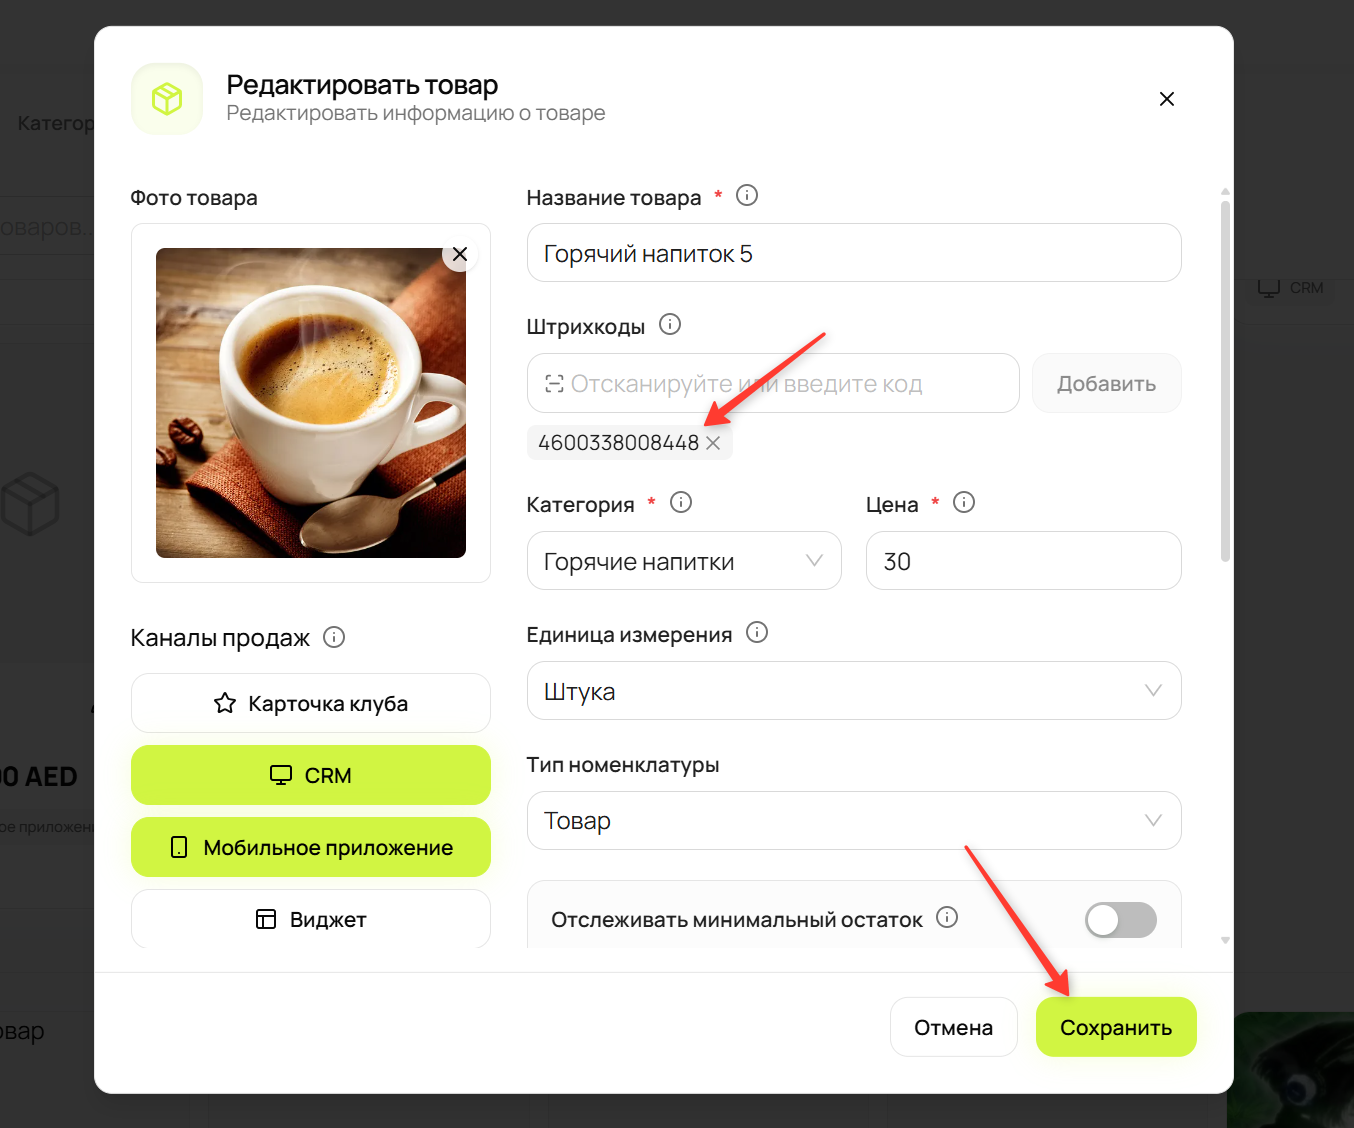
The barcode does not become active until the product card is saved. To remove a code, select the cross on its tag and save again.
Restrictions
Section titled “Restrictions”- Within one club, a barcode can belong to only one product.
- Matching is case-insensitive:
ABC-123andabc-123are the same code. - Latin letters, digits, and common characters such as a hyphen are accepted. Spaces are not.
- If the code is already assigned, CRM identifies its current product.
- If a barcode conflict occurs, the other product card changes are not saved either.
- Archiving a product releases its barcodes.
4. Sell a product
Section titled “4. Sell a product”- Open Orders and select New Order.
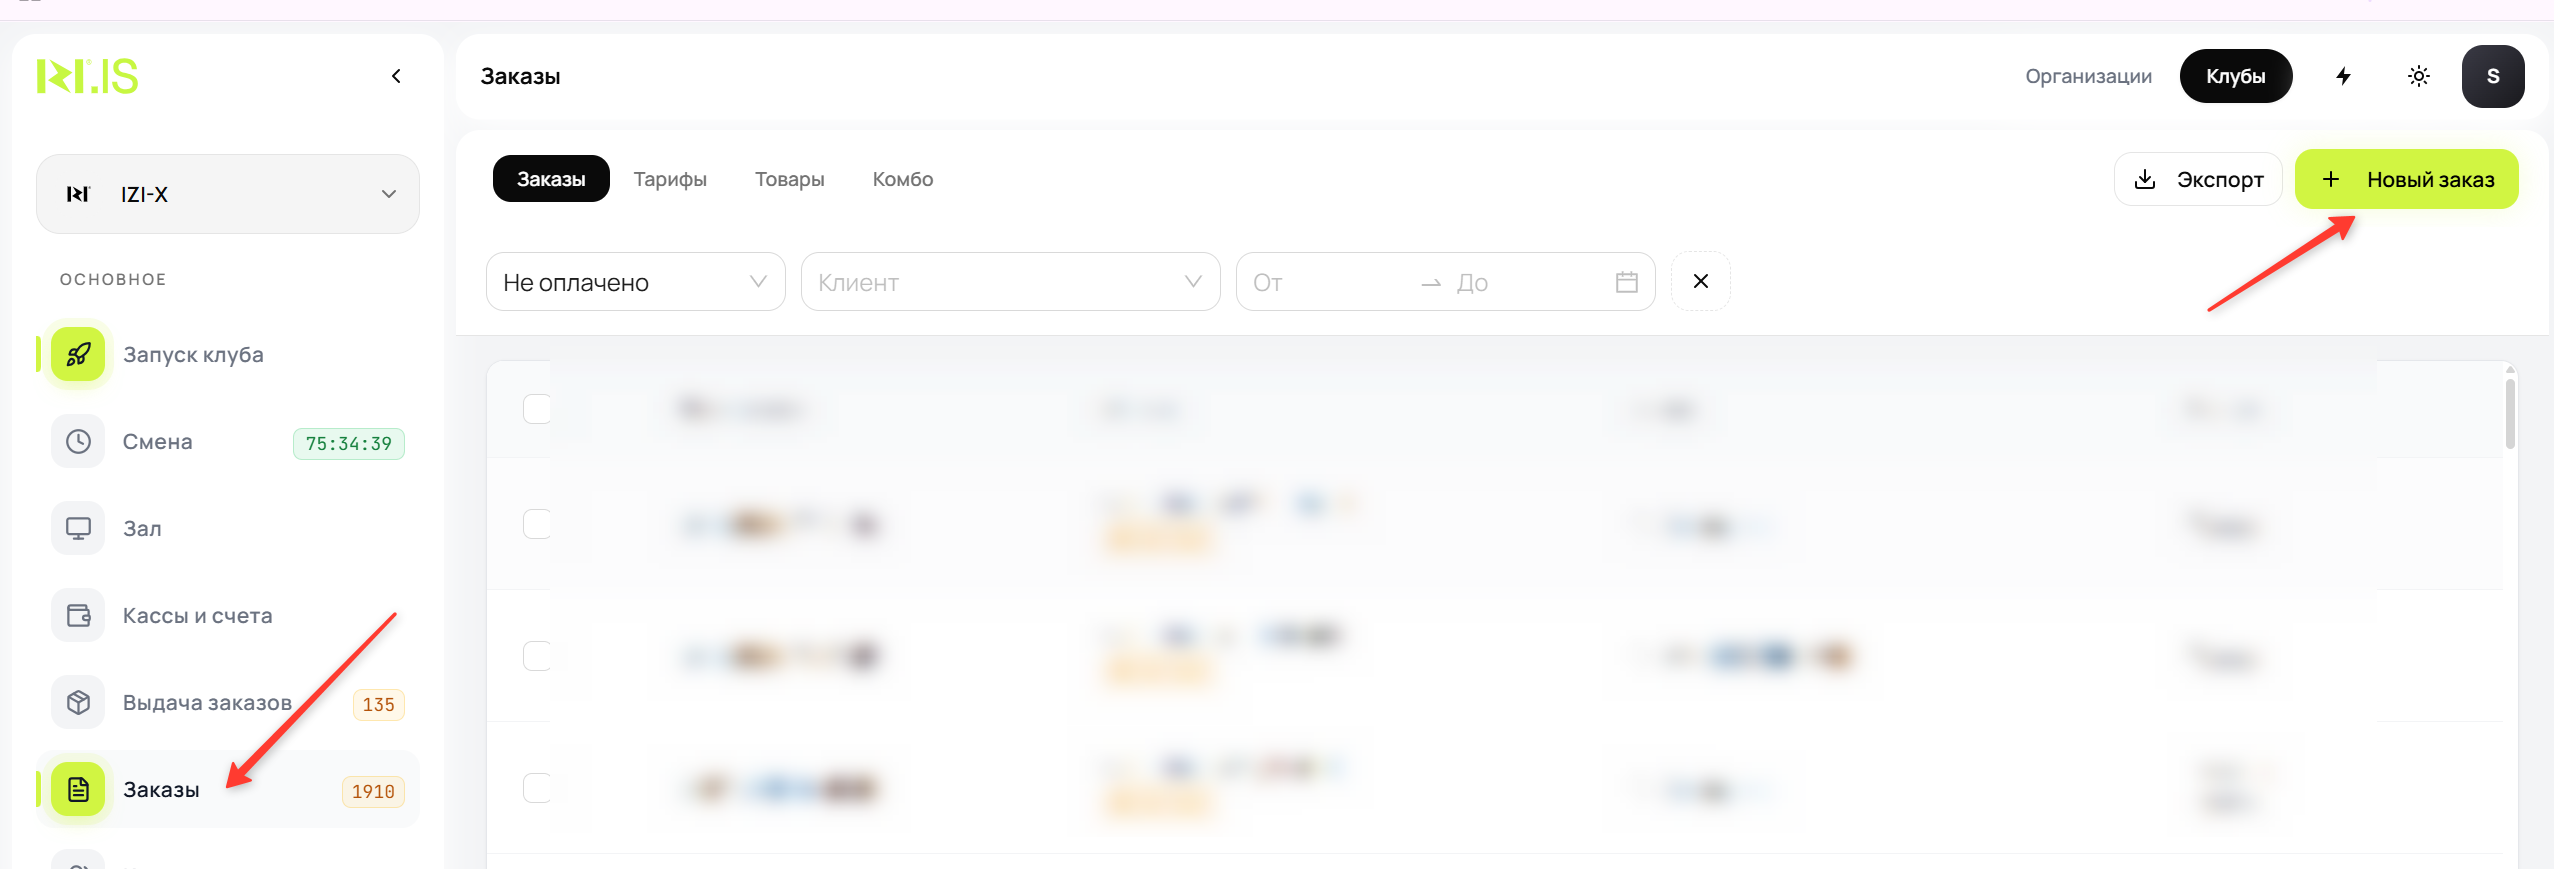
- Confirm that the scanner status line is visible.
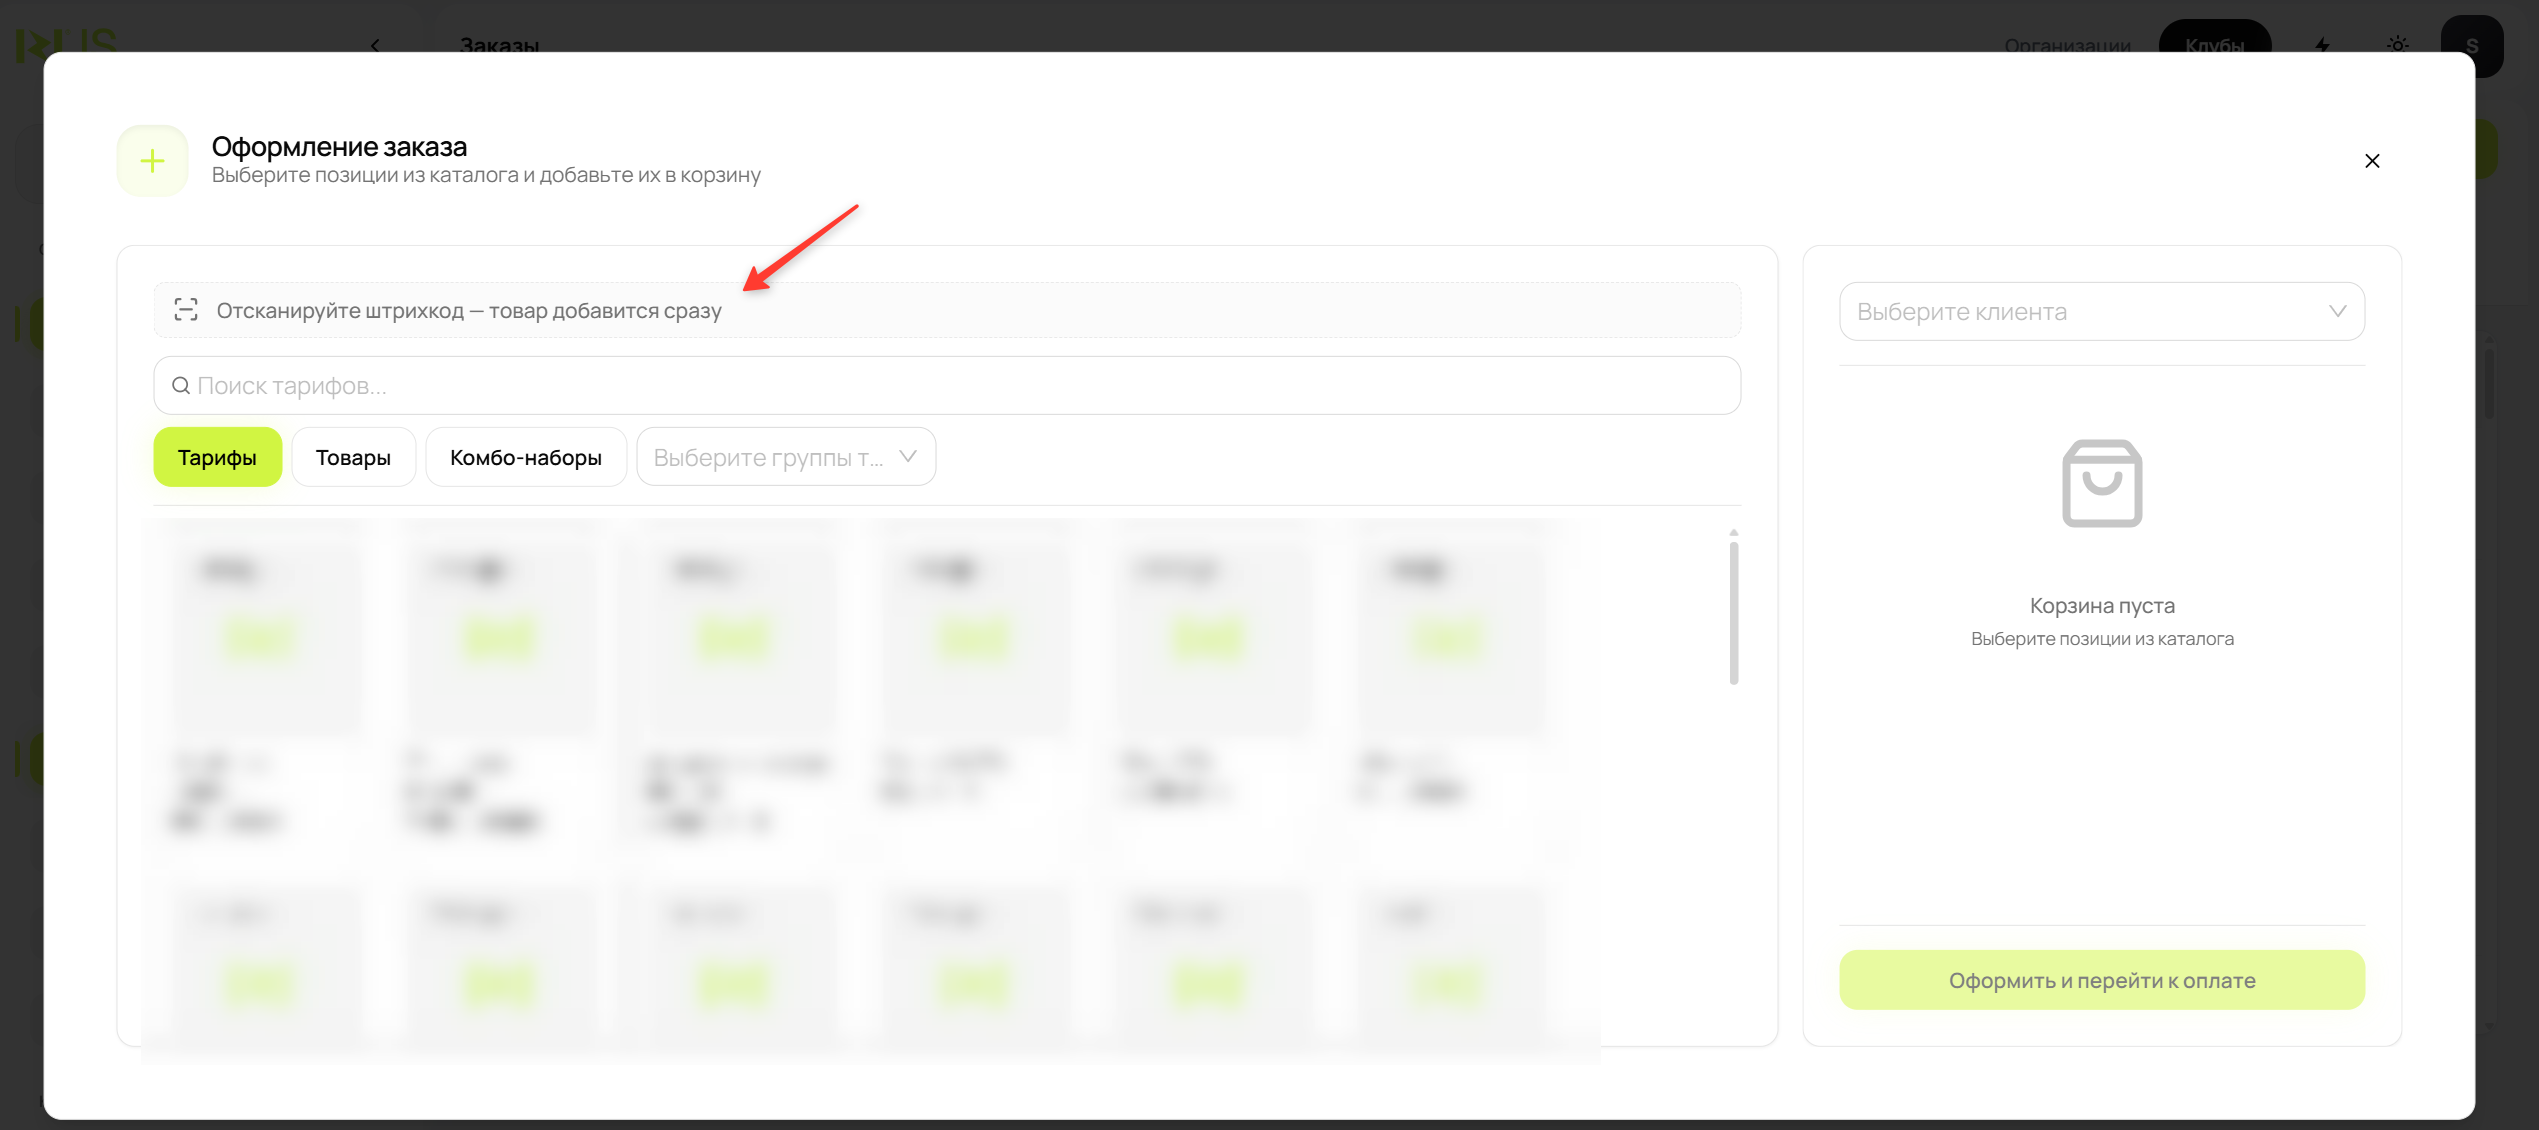
- Focus the Search products… field and scan the item.
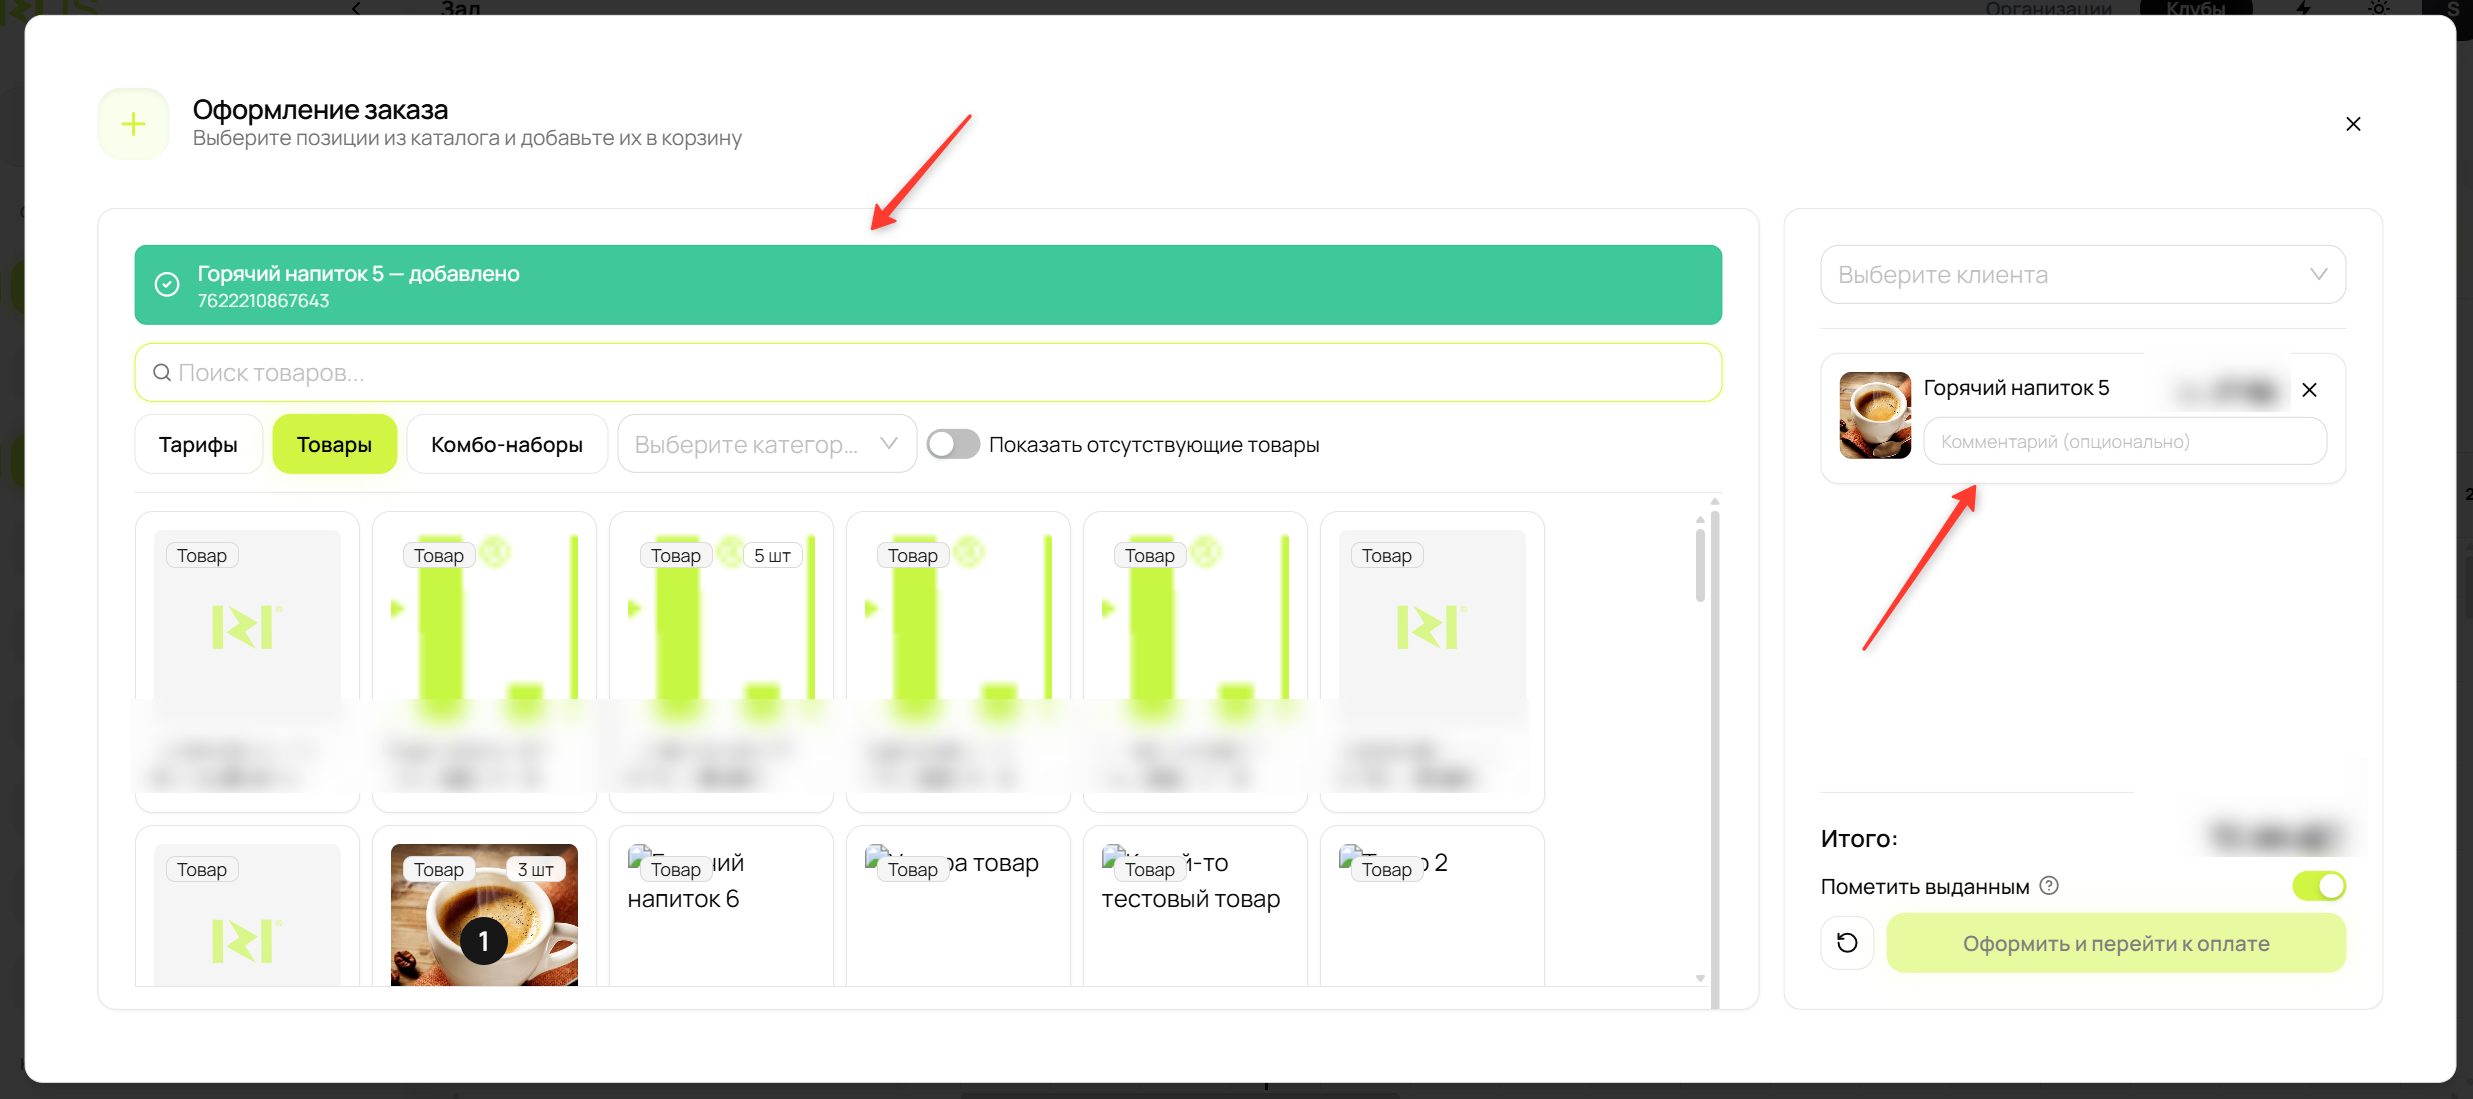
- A successful scan adds the product directly to the cart.
- Scanning the same product again increases its quantity.
Catalog filters and pagination do not prevent a barcode lookup.
Barcode not found
Section titled “Barcode not found”If the barcode is not assigned to an available product, CRM displays a red not-found message and does not change the cart.
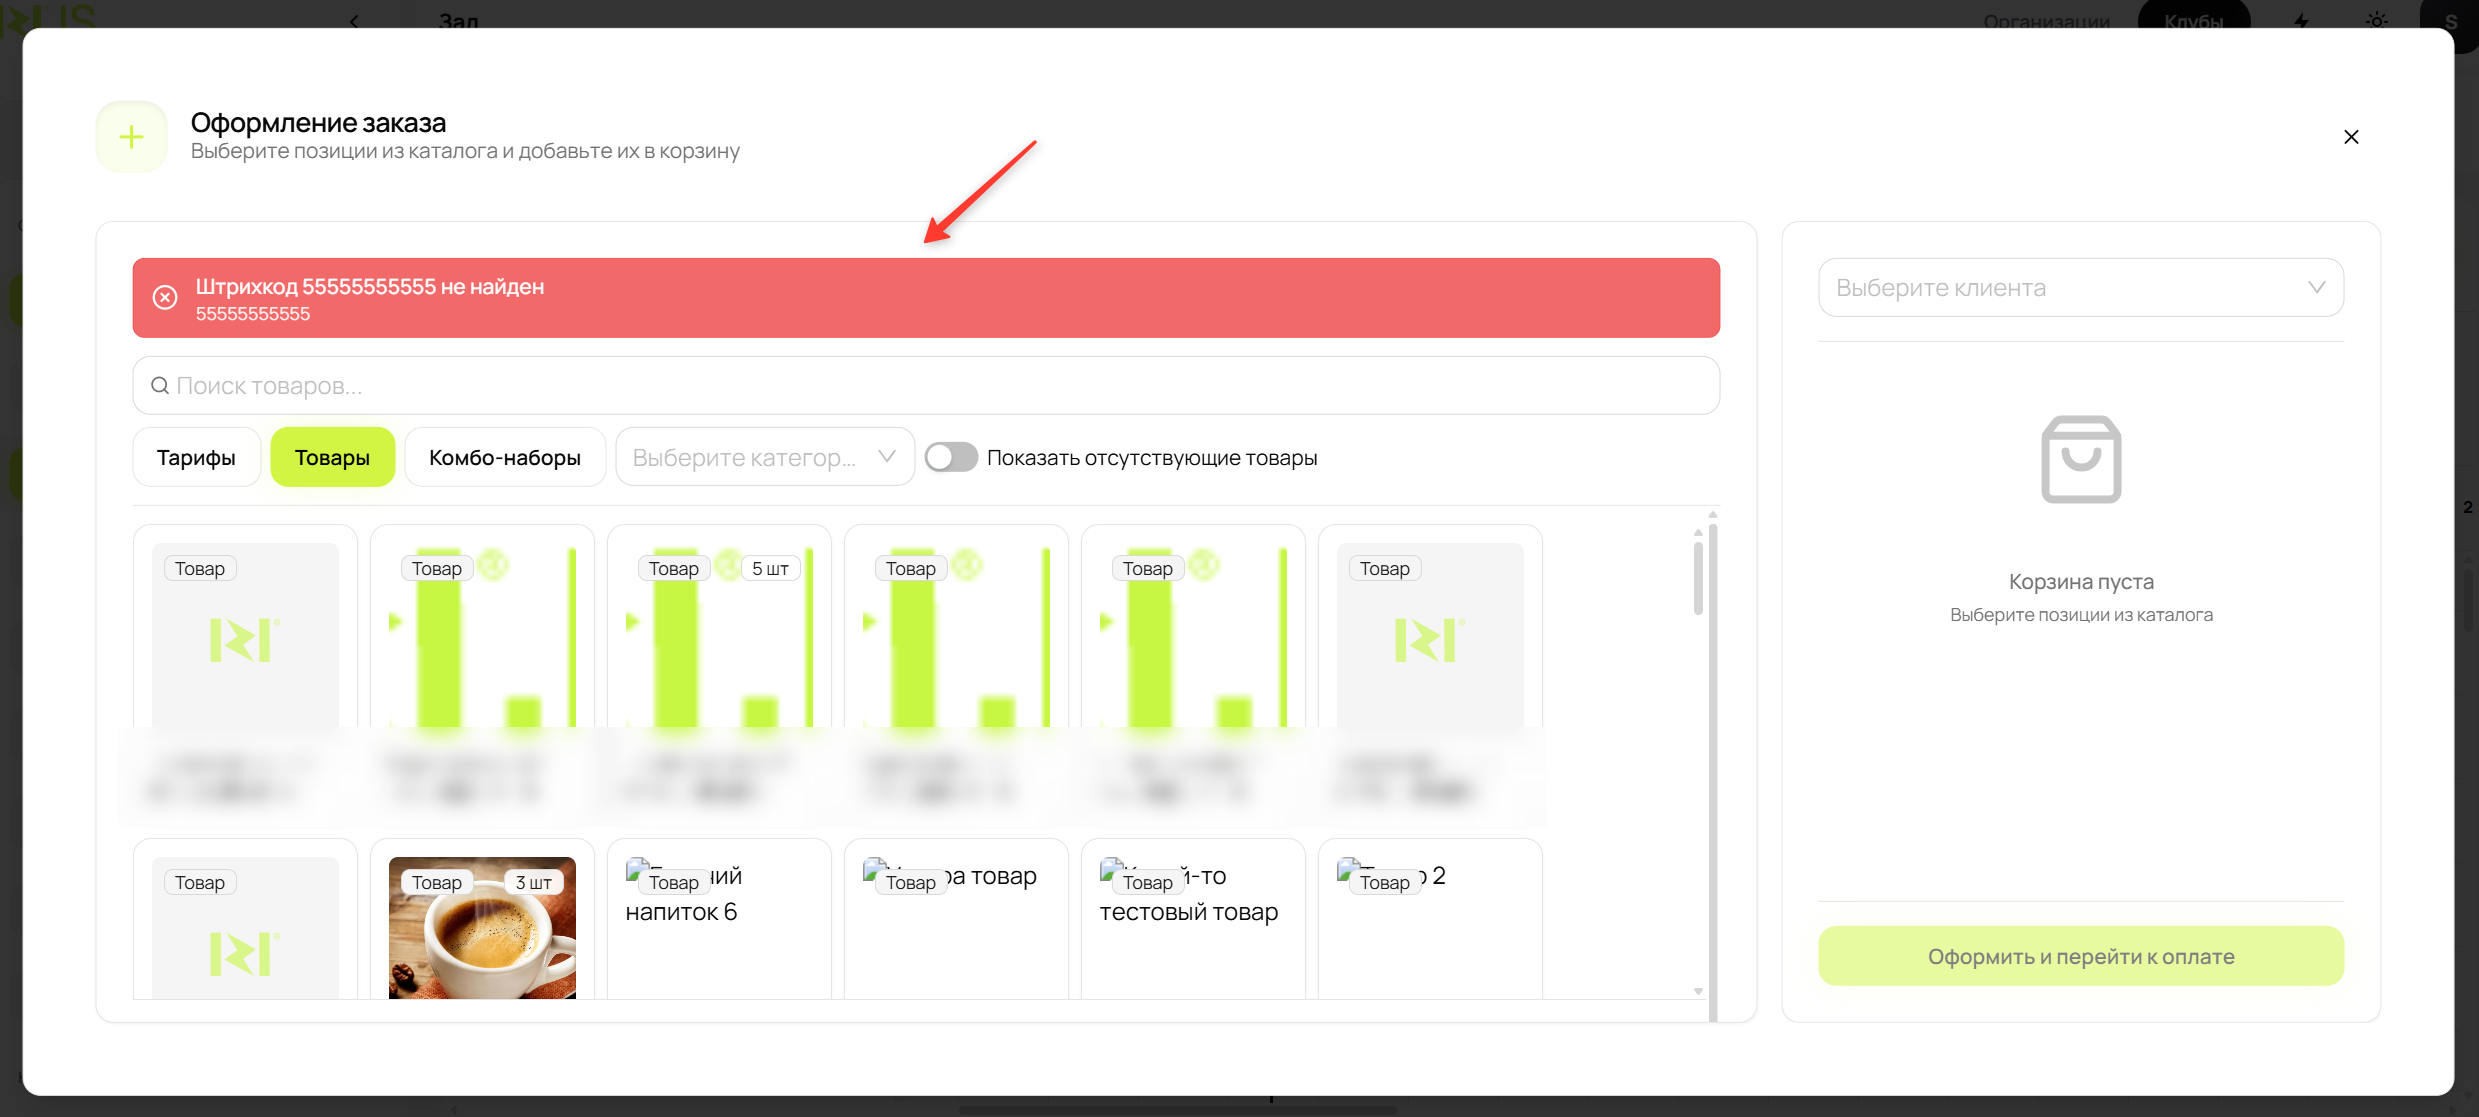
Check that the code was scanned correctly, assigned and saved, and that the product is active and available in the current club.
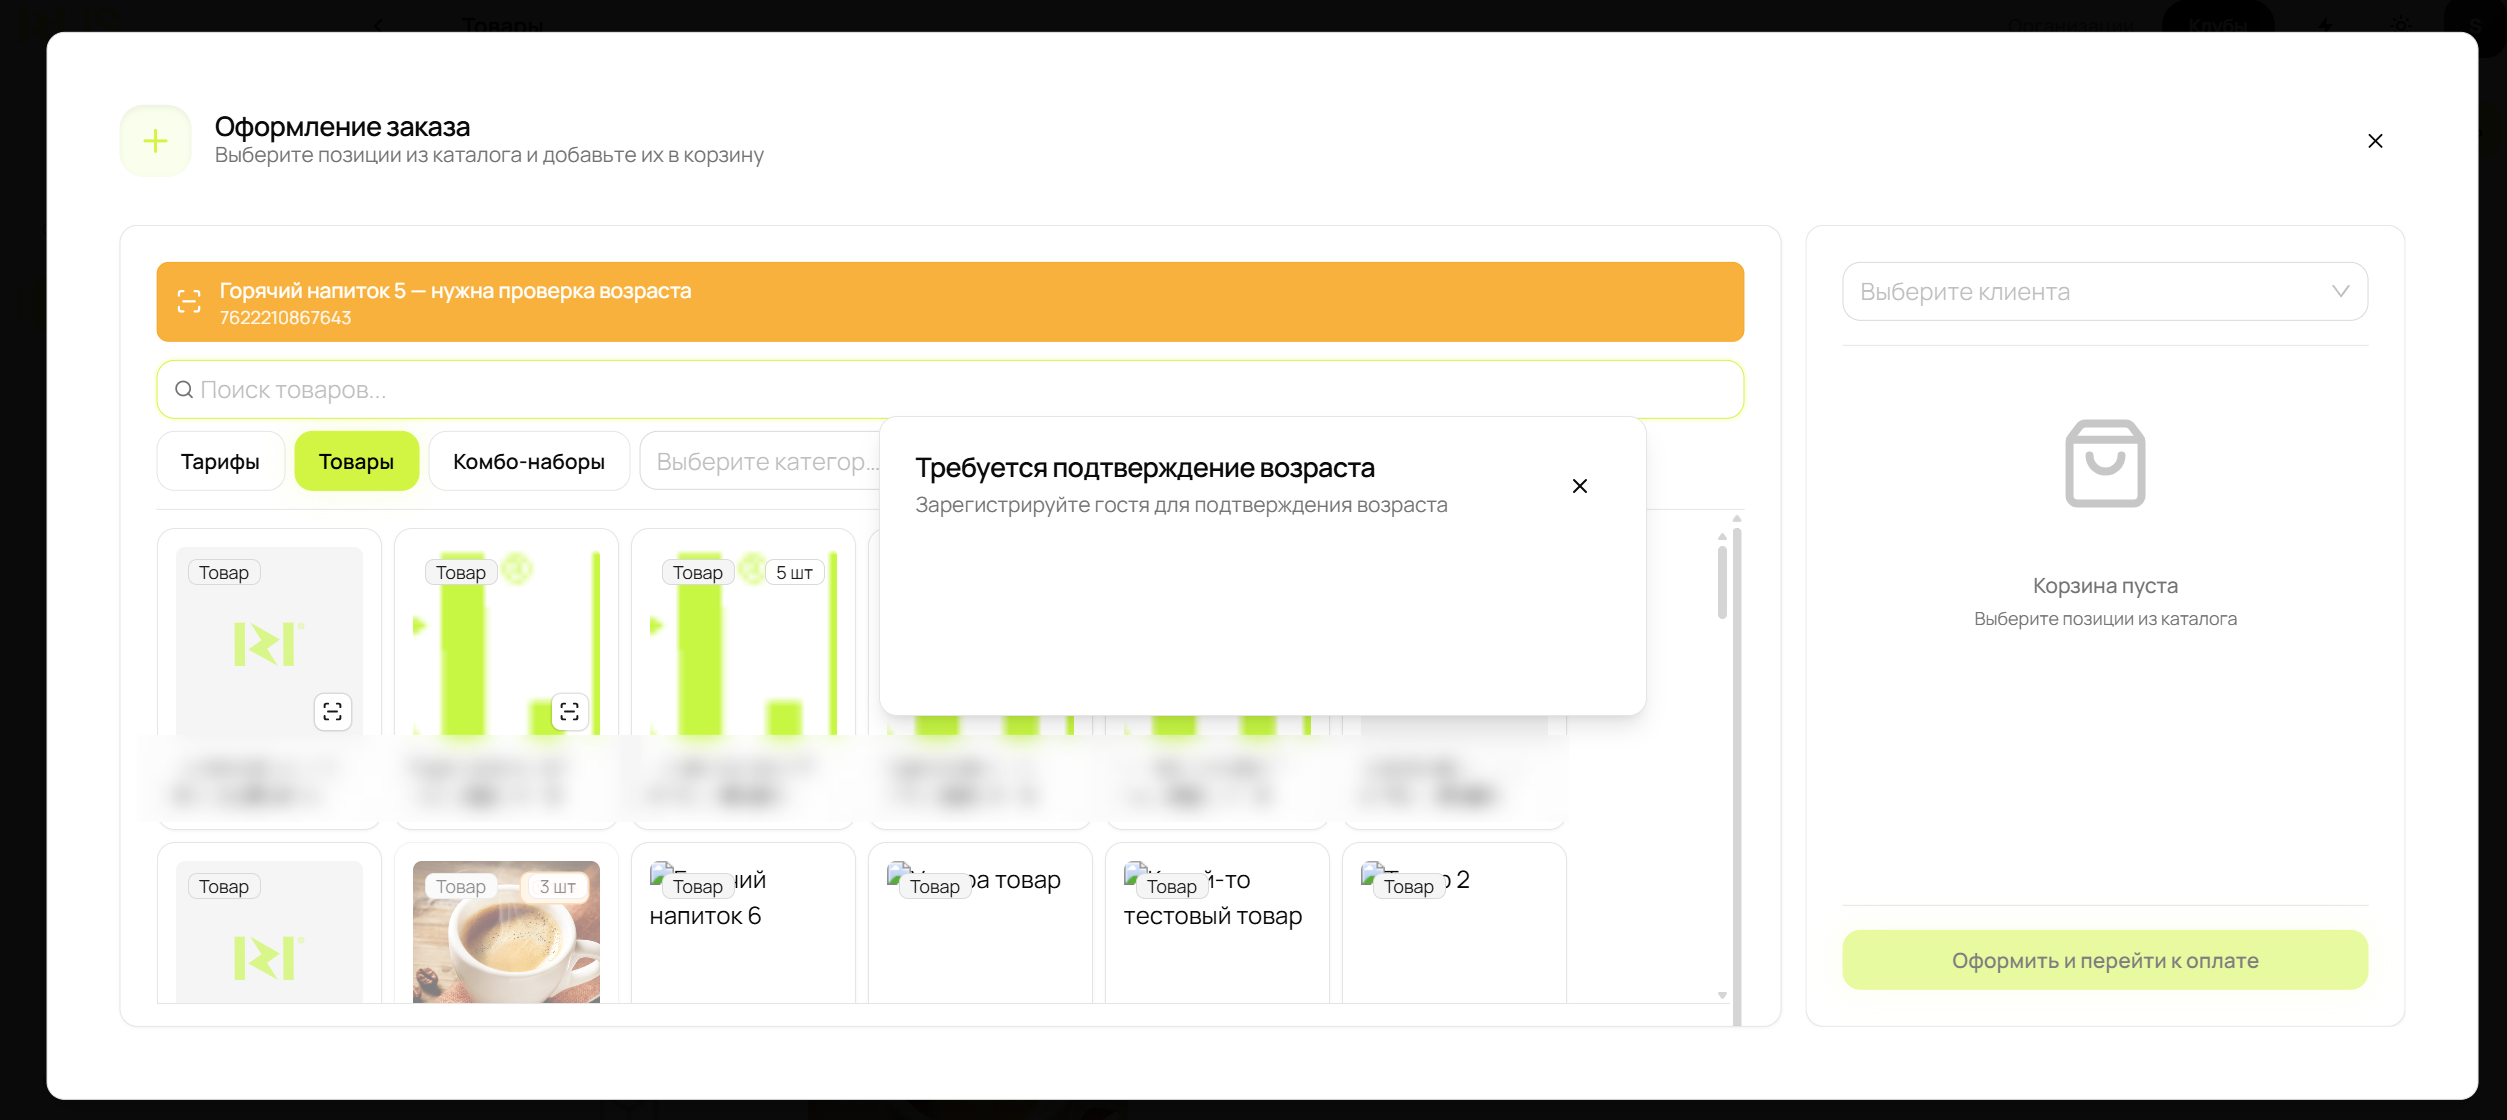
Age-restricted product
Section titled “Age-restricted product”CRM displays a yellow warning and opens the age verification dialog. Verify the customer or register the guest before continuing.
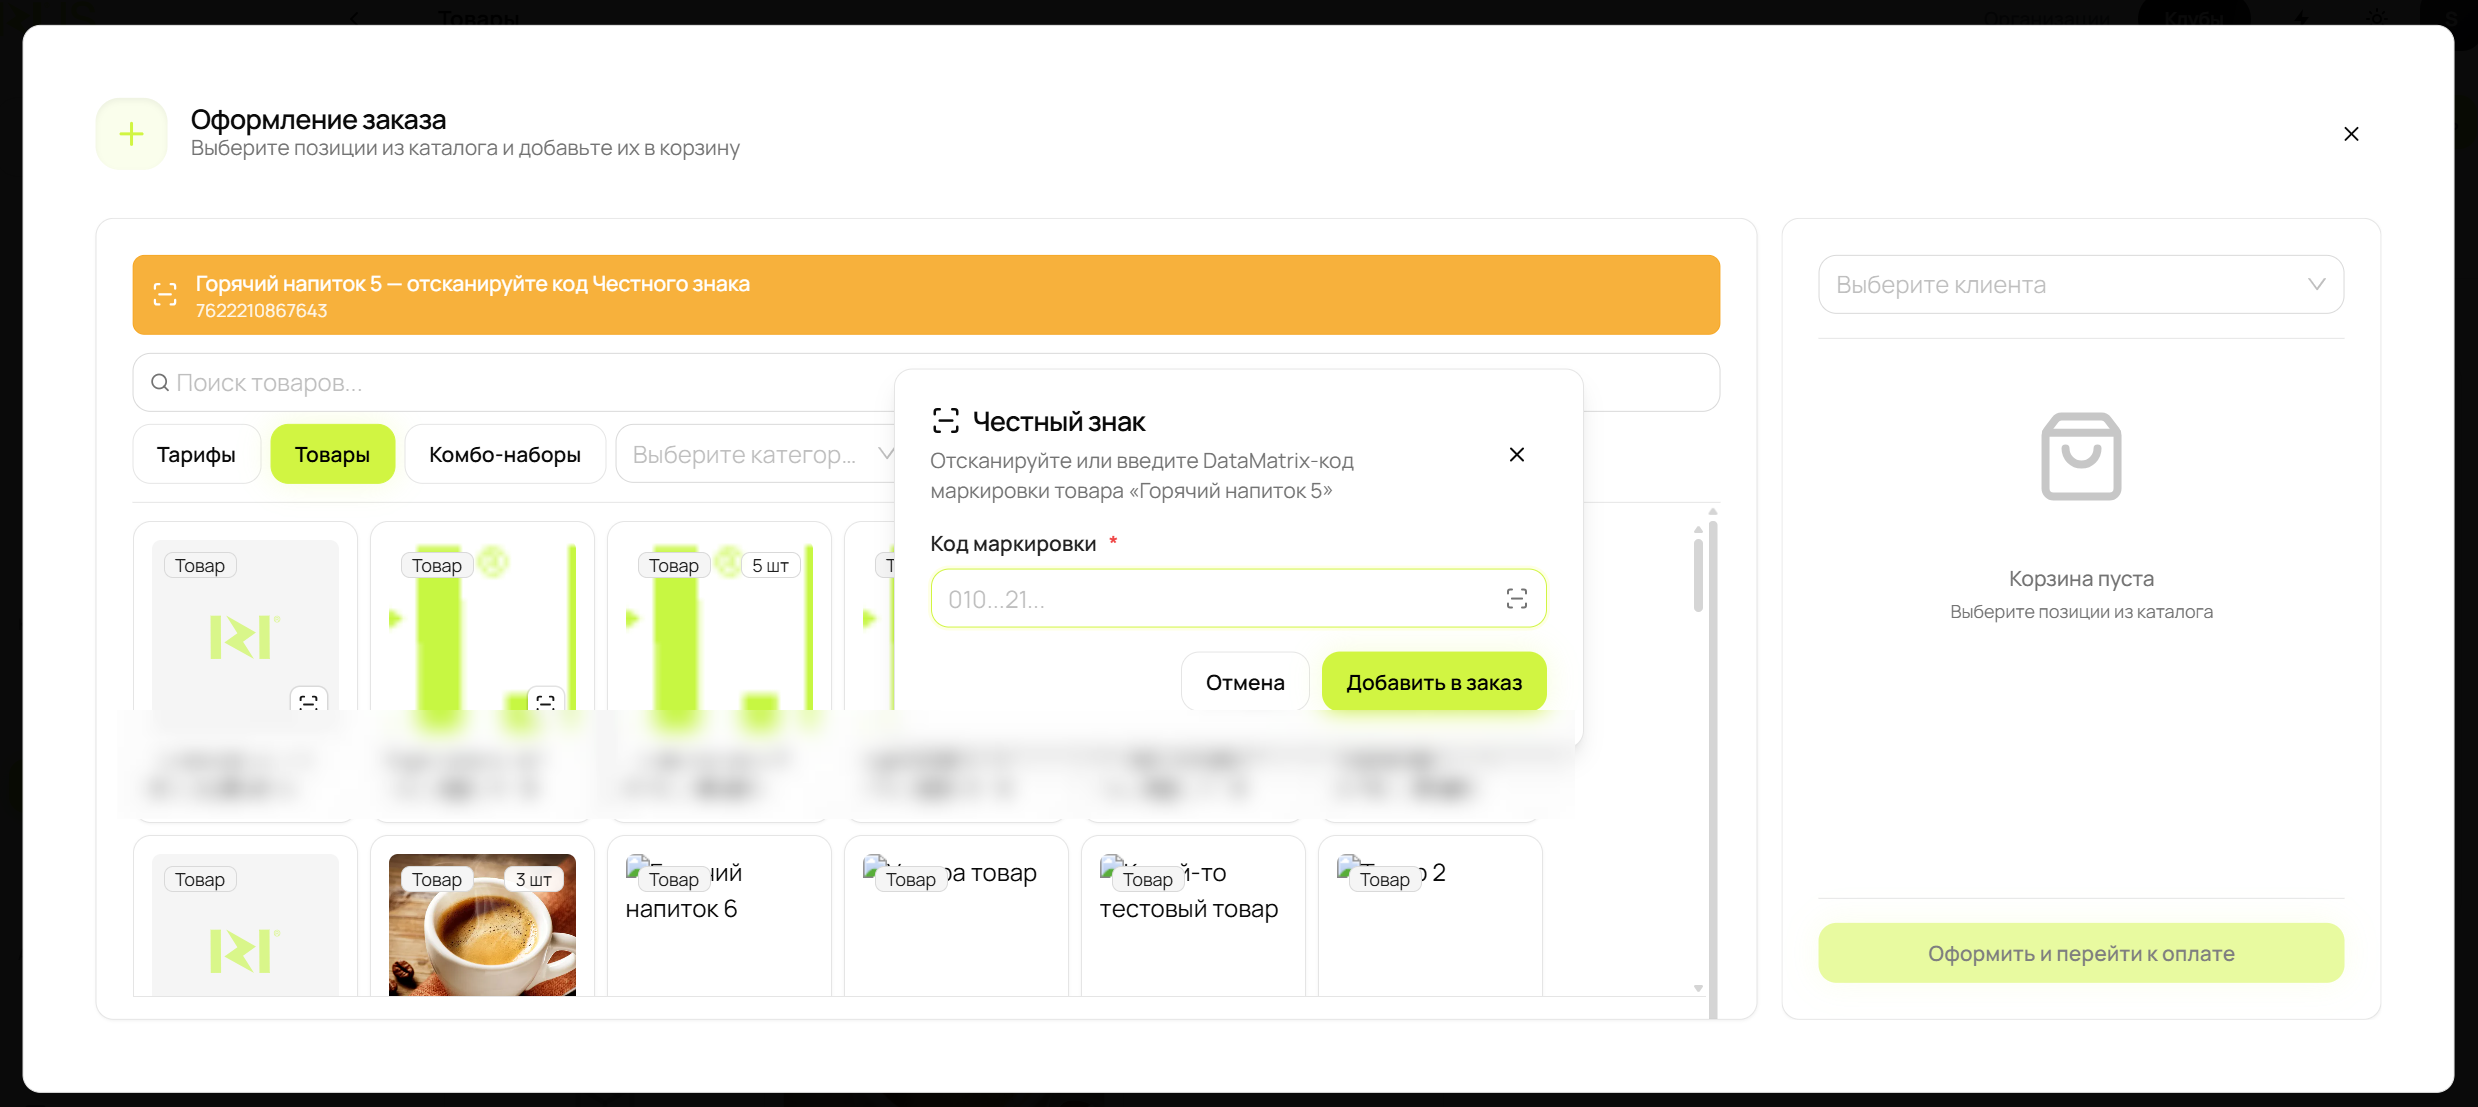
Honest Sign product
Section titled “Honest Sign product”The product barcode identifies the SKU, while the DataMatrix marking code identifies the individual item:
- Scan the normal product barcode.
- Scan the DataMatrix code in the Honest Sign dialog.
- Select Add to Order if it does not happen automatically.
5. Receive goods
Section titled “5. Receive goods”- Open Warehouse → Goods Receipt.
- Confirm that the scanner status line is visible.
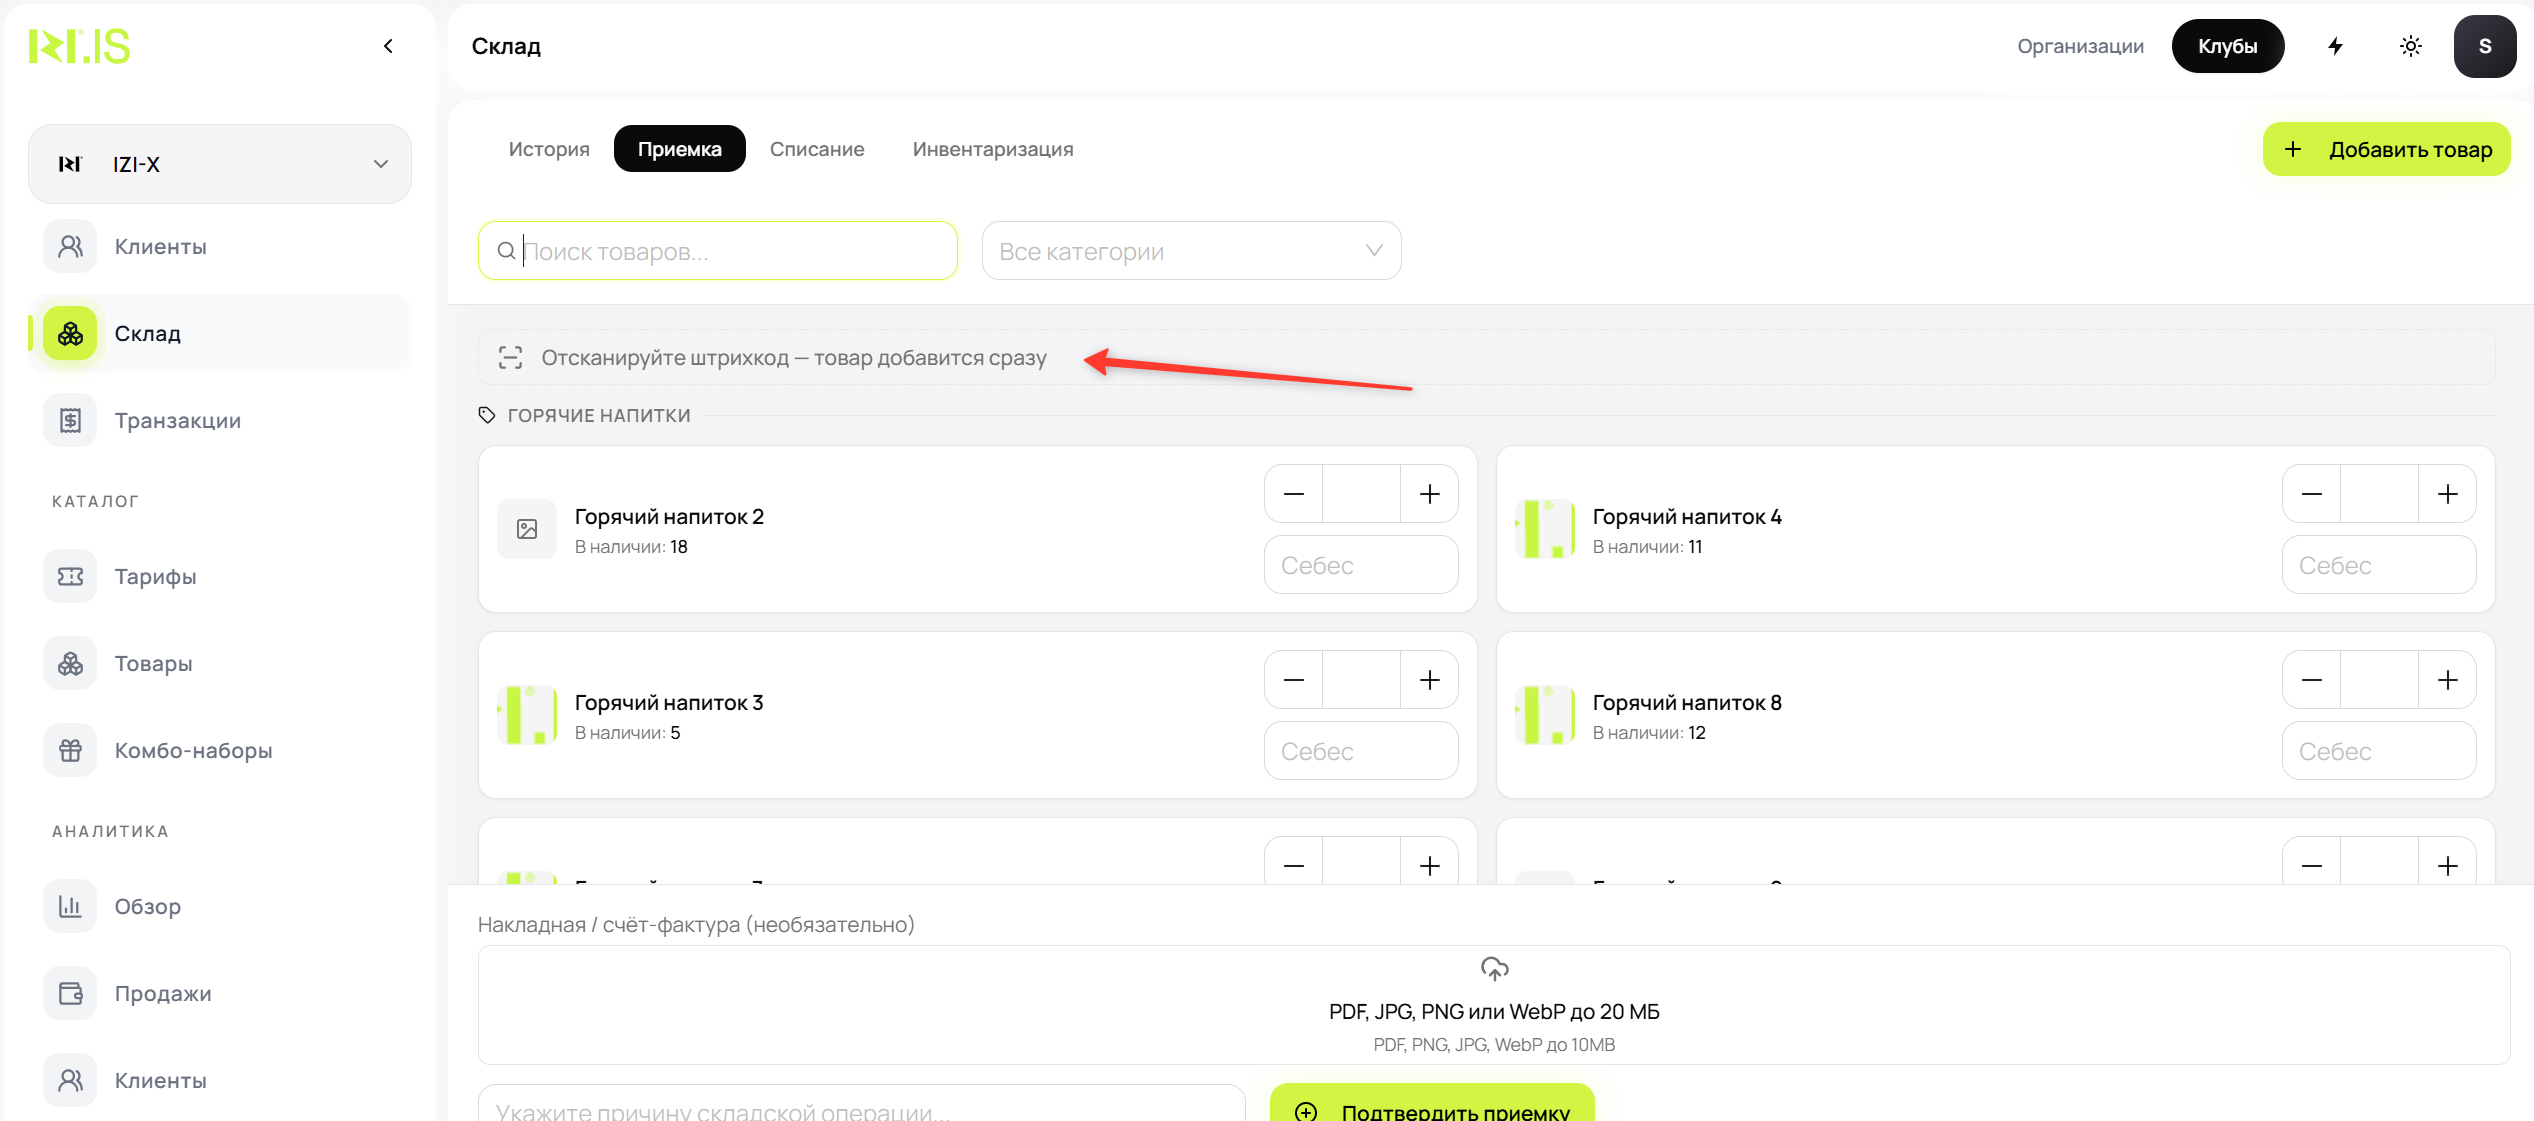
- Scan the product. It appears at the top in the Scanned section.
- Each additional scan increases the quantity by one.
- Check the quantity and unit cost, complete the required fields, and confirm the receipt.
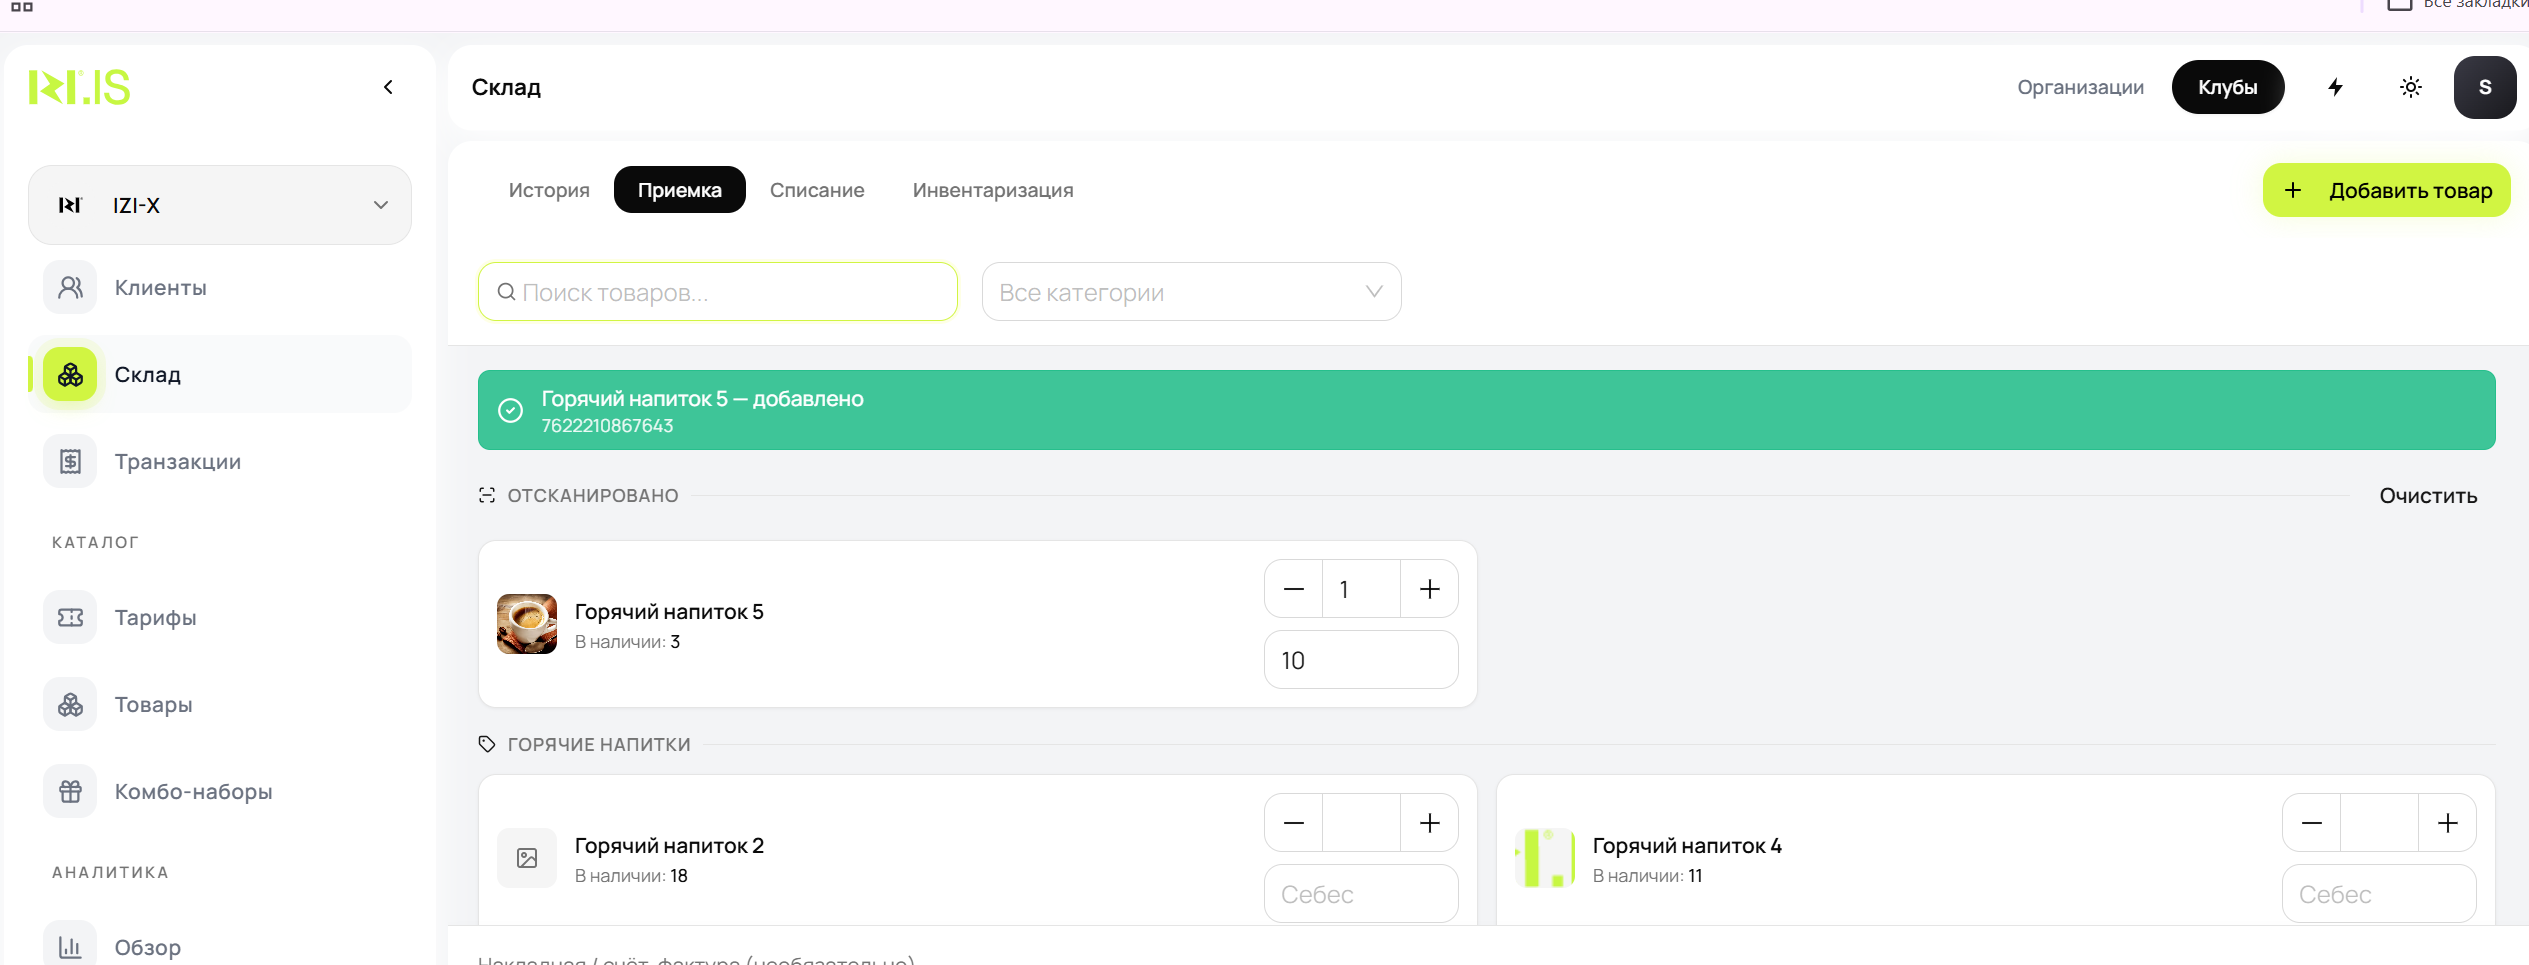
The scanned product remains pinned even when it is outside the current filter or page. Clear removes the pinned scan section and its status message, but does not undo quantities already entered.
6. Write off goods
Section titled “6. Write off goods”- Open Warehouse → Write-Off and confirm that the scanner line is visible.
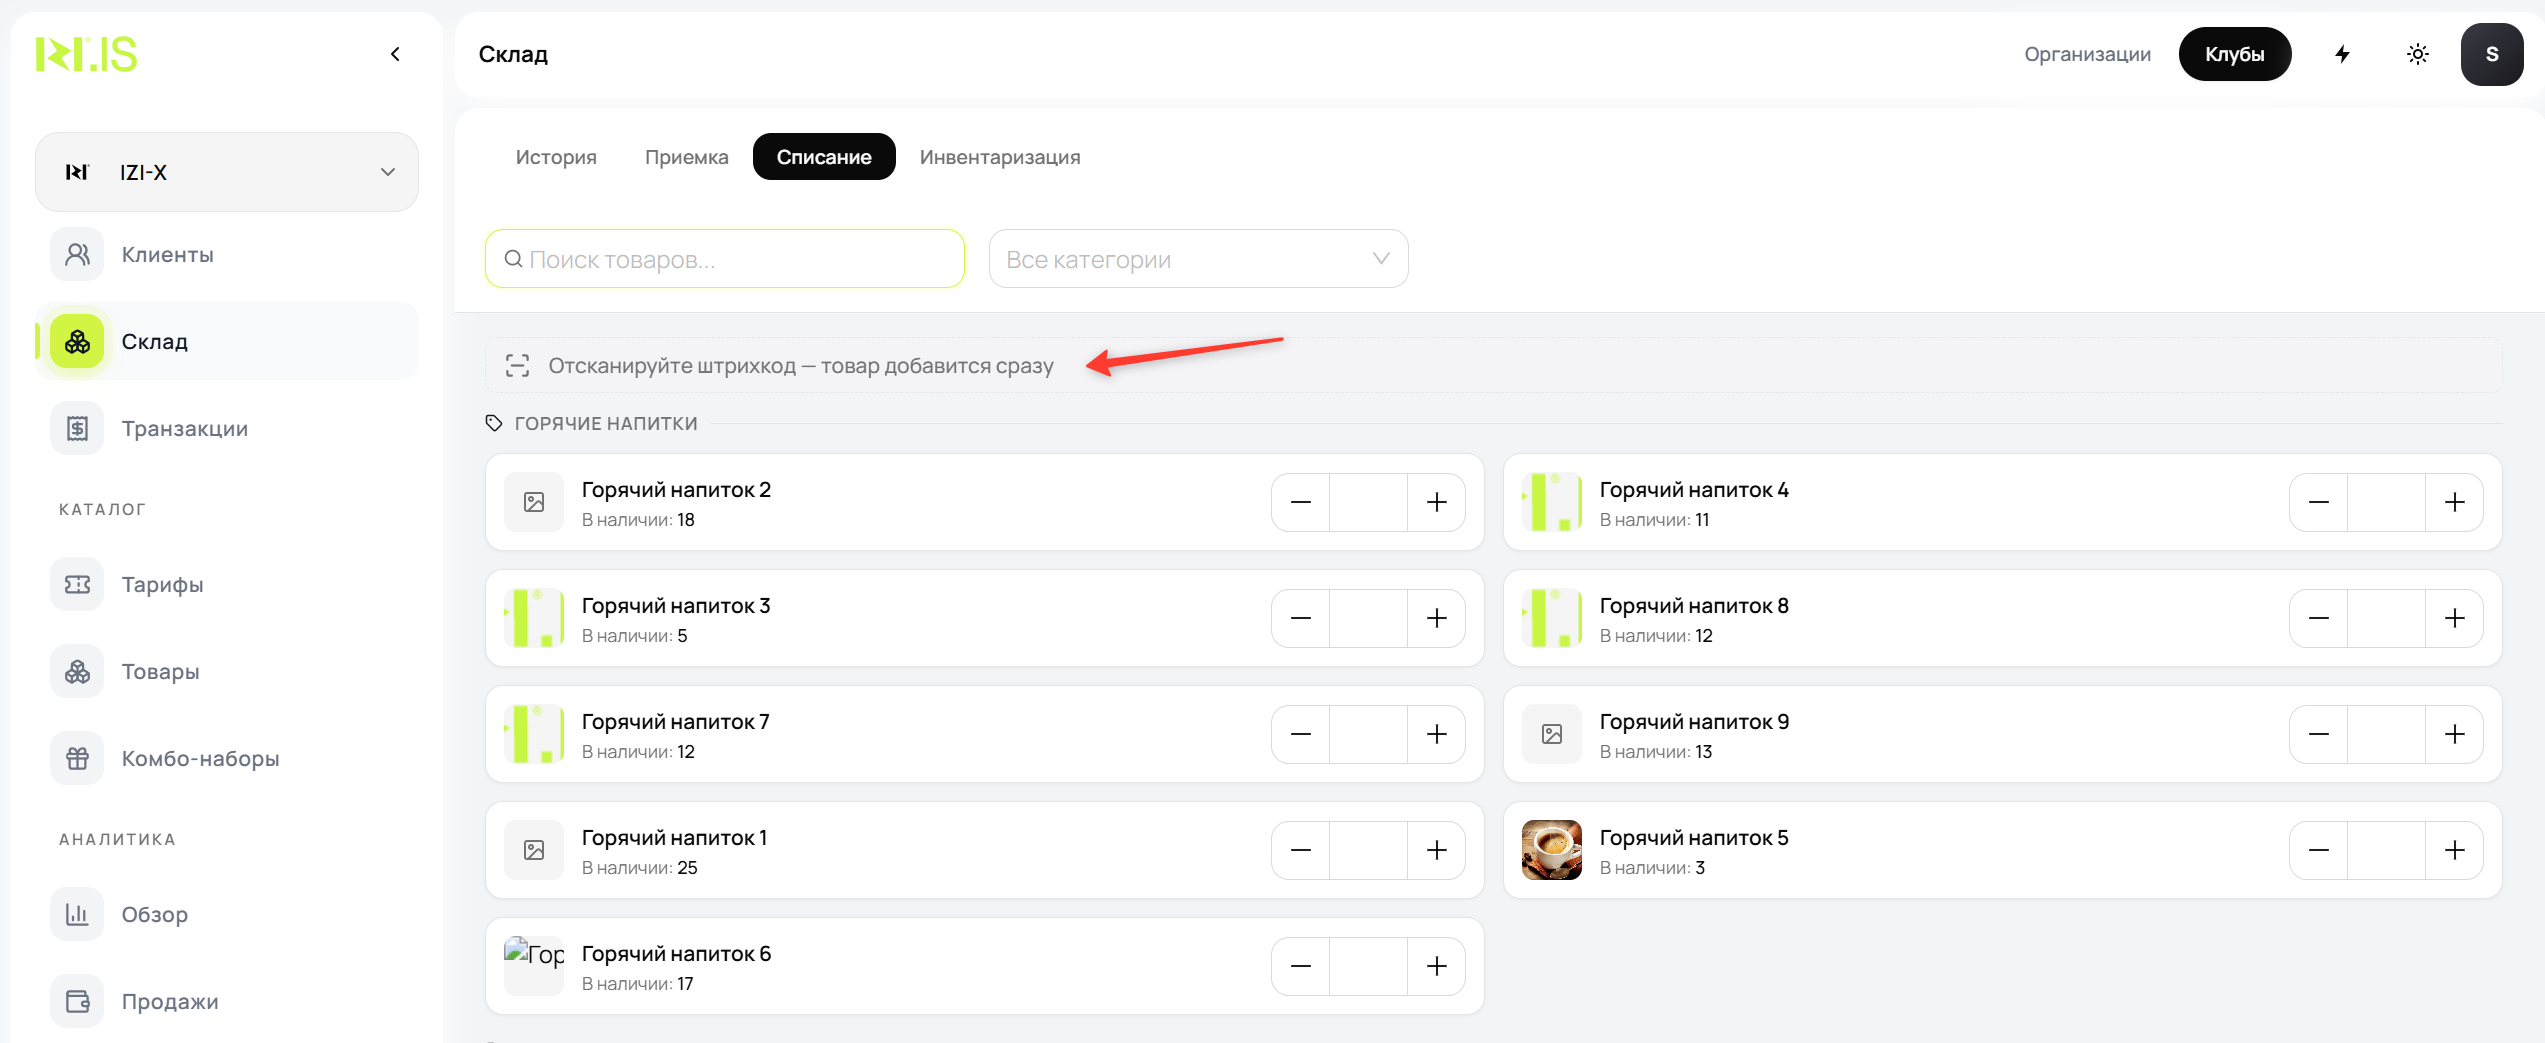
- Scan the product. It appears in Scanned with quantity
1. - Each additional scan increases the write-off quantity by one.
- Check the quantity, enter the reason, and confirm the operation.
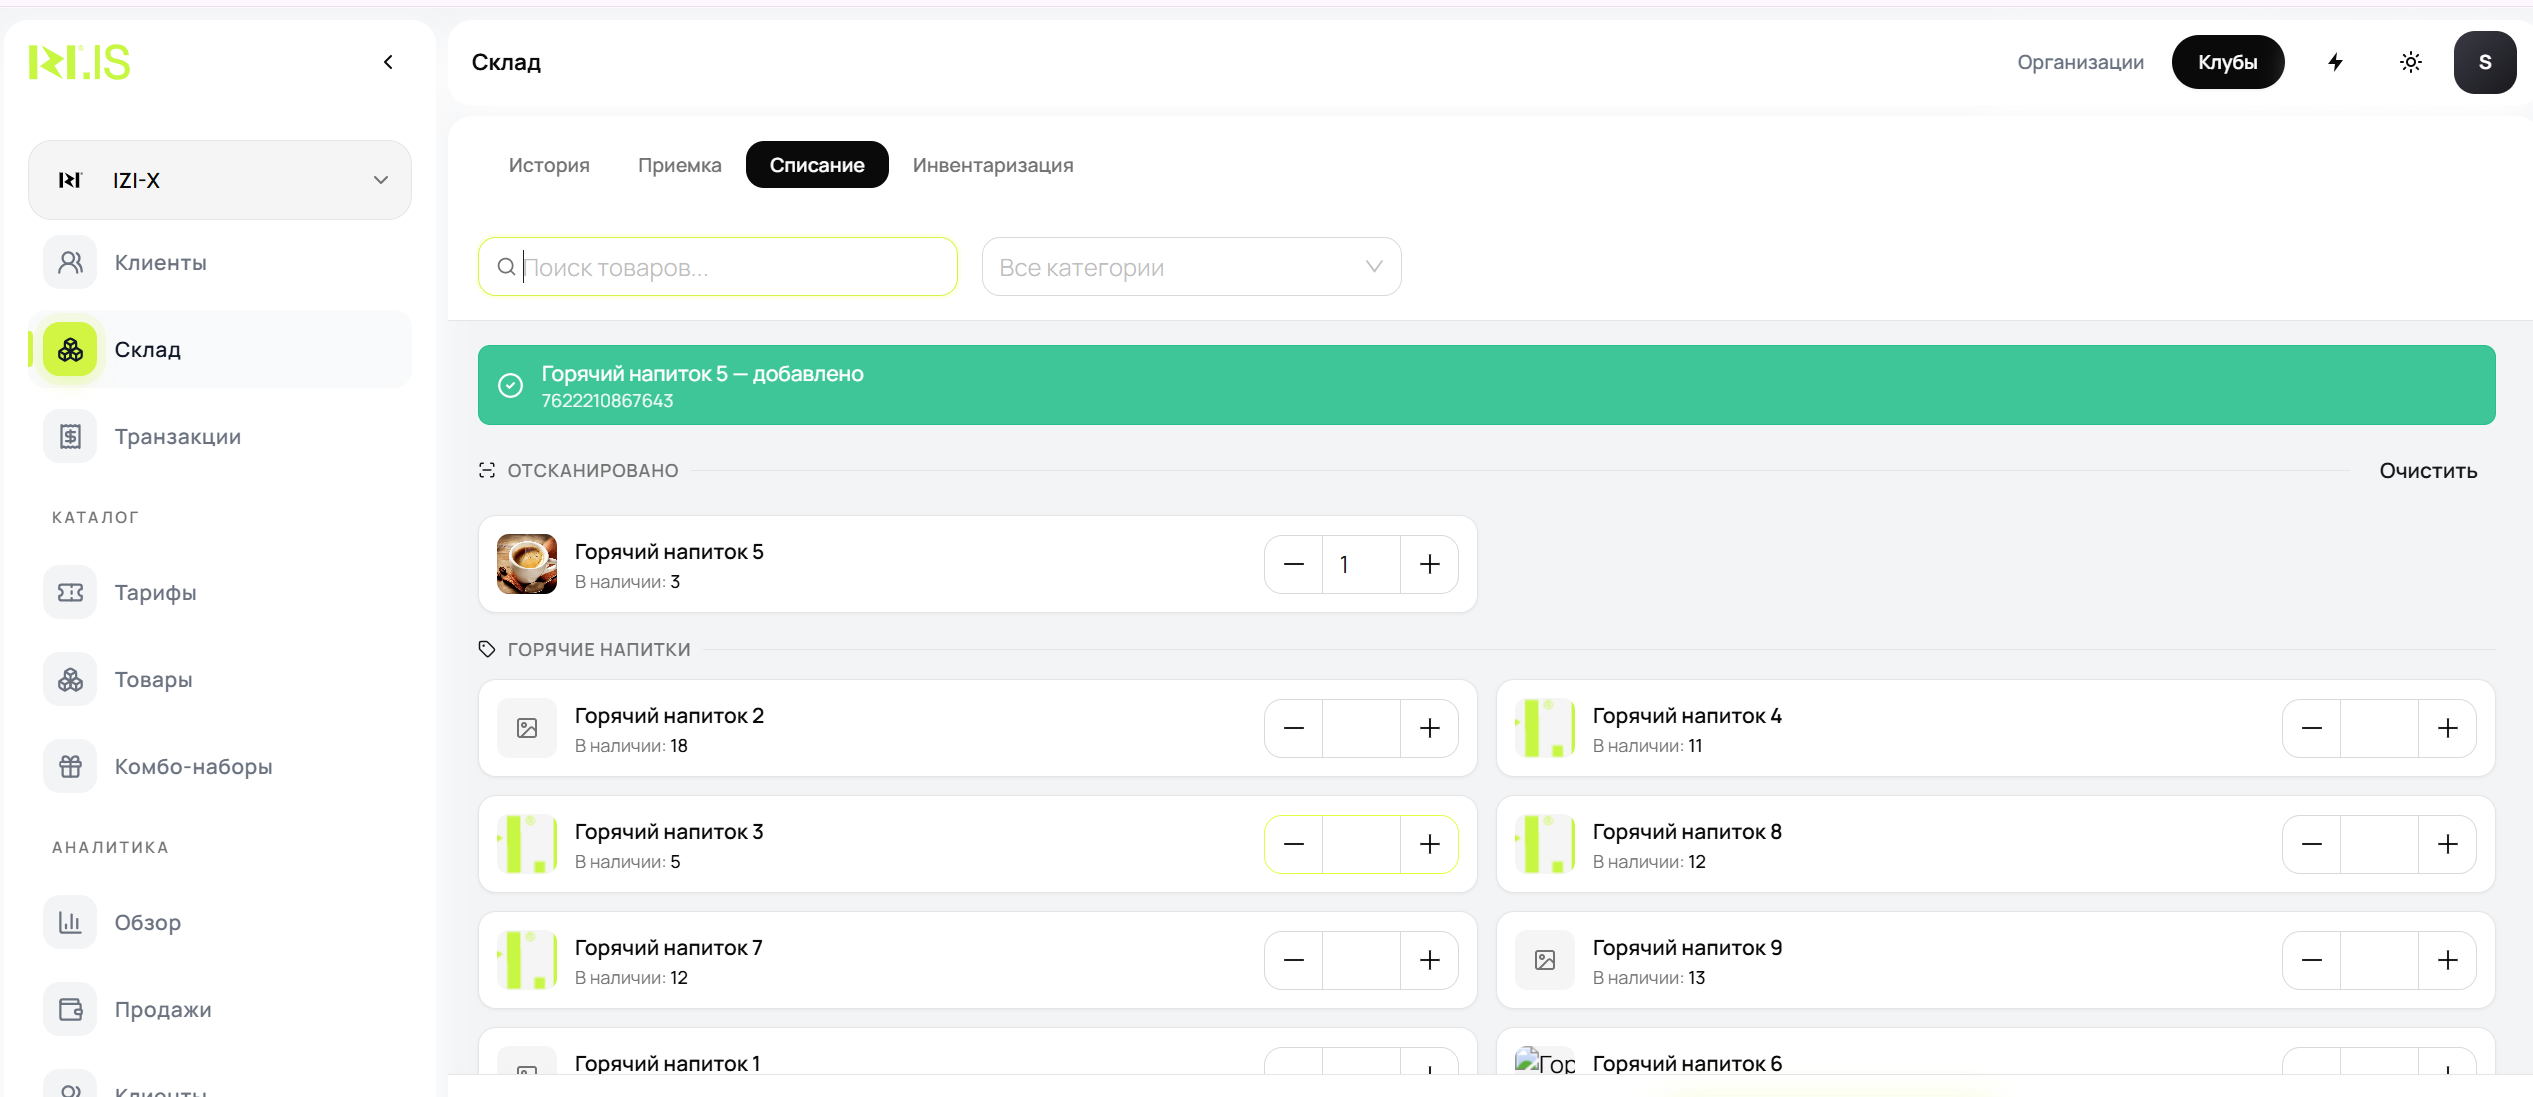
The write-off quantity cannot exceed the available stock.
7. Perform an inventory count
Section titled “7. Perform an inventory count”- Open Warehouse → Inventory and confirm that the scanner line is visible.
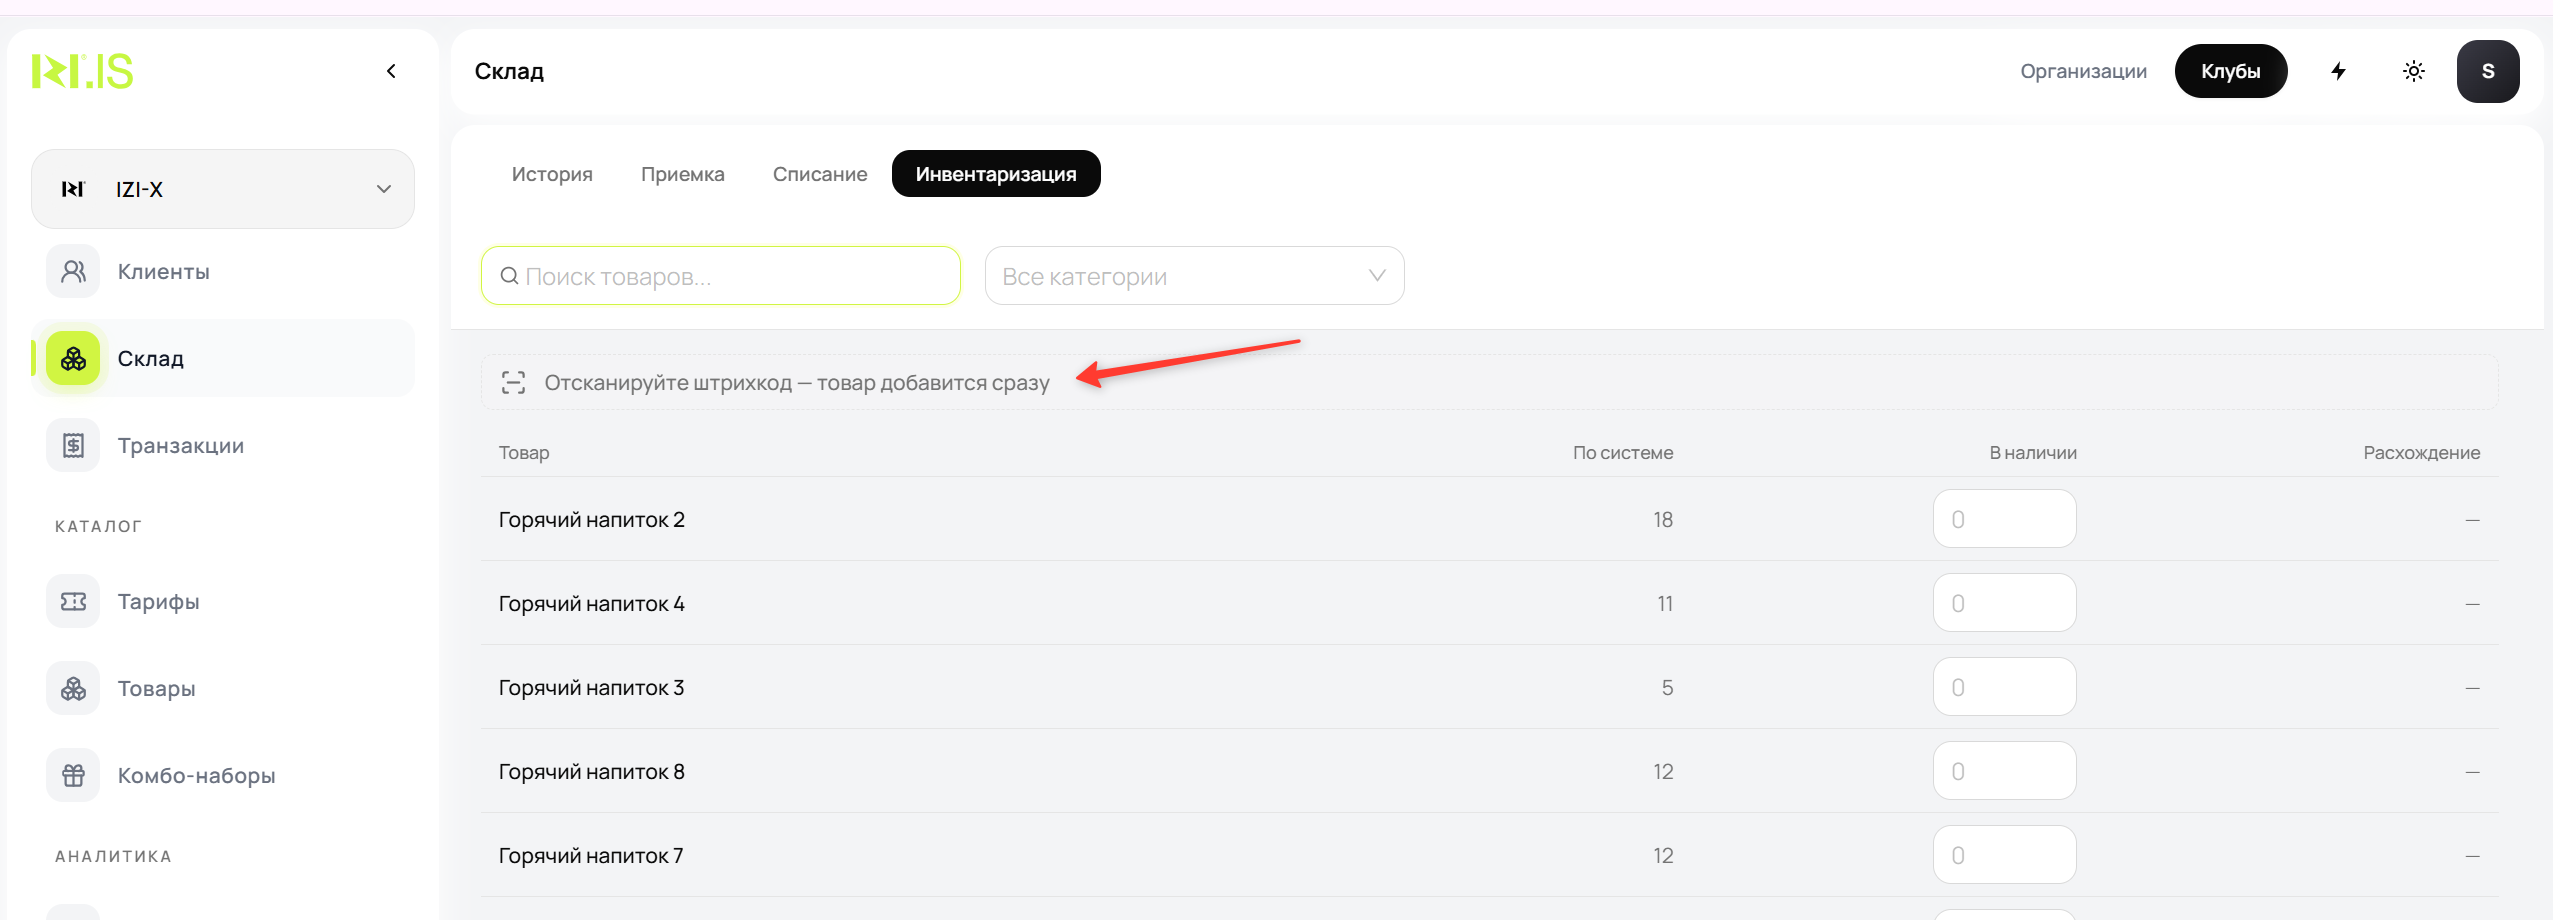
- Scan each physical unit you count.
- The first scan sets In Stock to
1; each additional scan increases it by one. - Review the counted quantity and the discrepancy against system stock.
- Enable automatic stock adjustment if required, then confirm the inventory count.
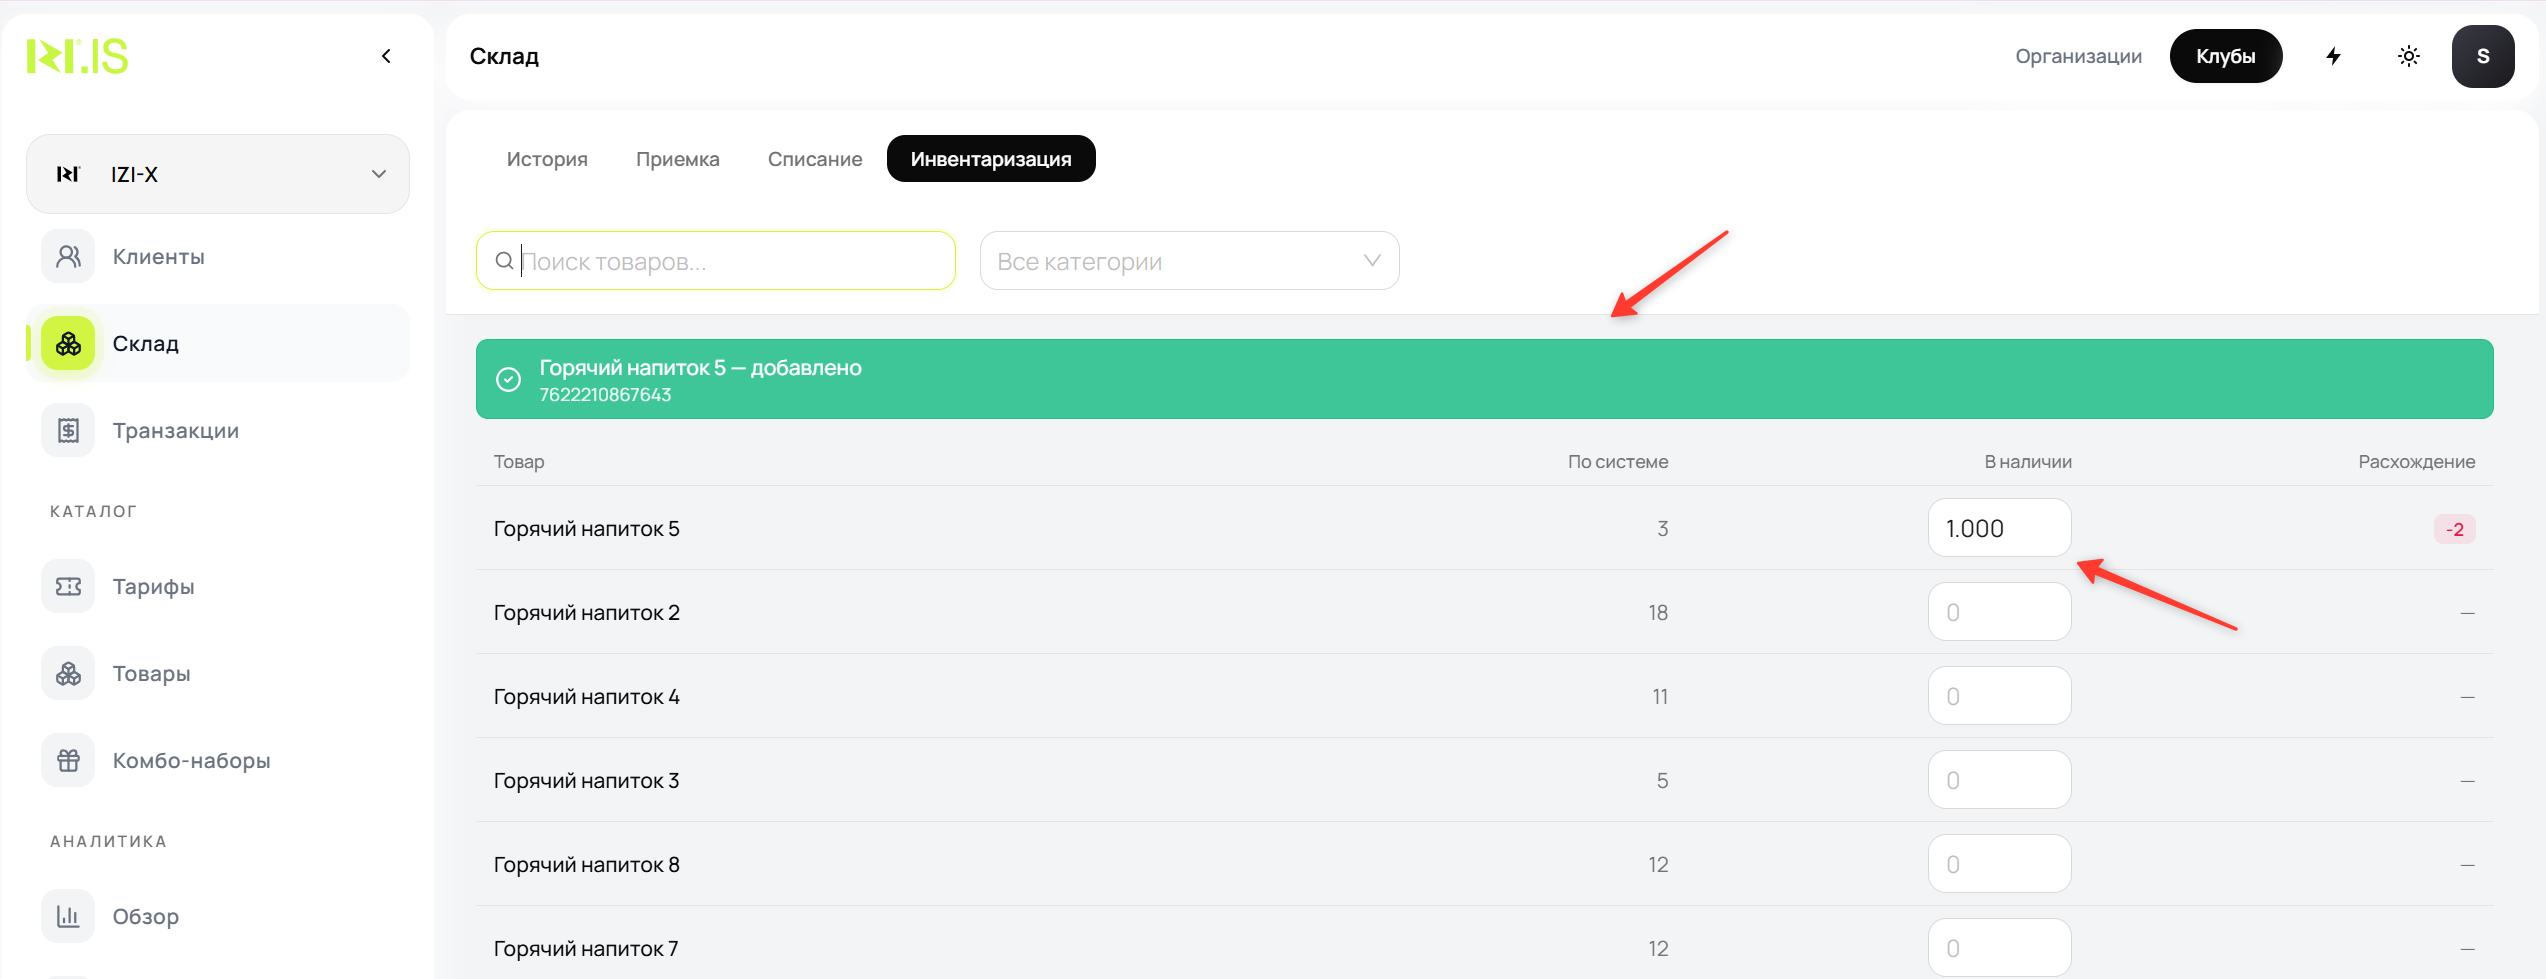
For weight- or volume-based products, scanning only locates the row. Enter the actual weight or volume manually.
8. Status colors
Section titled “8. Status colors”- Green — the product was added or its quantity was increased.
- Red — the code was not found, the product is out of stock, or an error occurred.
- Yellow — another action is required, such as age verification or an Honest Sign scan.
The result is also accompanied by an audio signal.
9. If scanning does not work
Section titled “9. If scanning does not work”Check that:
- Barcode Scanner is enabled for the club.
- The code is assigned to the product and the card was saved.
- The product is active and available in the selected club.
- The scanner sends
Enterafter the code and operates as a USB keyboard. - The code contains 6–64 characters and no spaces.
- No unrelated dialog or text field is receiving keyboard input.
One failed scan does not block the next one. Resolve the cause, clear the search field, and scan the next product.
See also
Section titled “See also”IZI LLC (ООО «ИЗИ»), TIN 7842227686, OGRN 1257800012249, office 1, premises 3-N, lit. A, 15-17 Perekupnoy lane, Saint Petersburg, 191024, Russia, admin@izi.is · Cookie settings